A study revealed that only 5 out of 100 visitors purchase. This implies that the remaining 95 don’t buy when they visit an online store, for instance.

But what do you do with these people who come and go without taking the action you want? This is why lead capture comes.
Lead capture is the process of collecting personal information from potential customers so you can follow up with them later. You collect names, email addresses, and phone numbers through forms on landing pages, pop-ups, or gated content like ebooks.
But what tool should you use to create these forms?
In this article, I will share the best lead capture software to collect more potential customers. I will also share tips that will help you choose a tool that fits your needs.
Let’s get started!
Best Lead Capture Software Compared
| Tool | Standout Features | Ease Of Use | Personal Rating | Best For |
|---|---|---|---|---|
meetergo | Routing and FunnelMeeting TypesContactWorkflowAnalytics | Easy | ⭐⭐⭐⭐4.5/5 stars | Sales teams looking to route inbound leads automatically into booked meetings. |
Toolmeetergo Standout FeaturesRouting and FunnelMeeting TypesContactWorkflowAnalytics Ease Of UseEasy Personal Rating⭐⭐⭐⭐4.5/5 stars Best ForSales teams looking to route inbound leads automatically into booked meetings. | ||||
HubSpot Marketing Hub | FormsCampaignEmailEventsAds | Moderate | ⭐⭐⭐⭐4.6/5 | Marketing teams that seek to capture leads’ contact info directly into their CRM with forms or landing pages |
ToolHubSpot Marketing Hub Standout FeaturesFormsCampaignEmailEventsAds Ease Of UseModerate Personal Rating⭐⭐⭐⭐4.6/5 Best ForMarketing teams that seek to capture leads’ contact info directly into their CRM with forms or landing pages | ||||
Apollo.io | PeopleCompanyDealsWorkflowCalls | Complex | ⭐⭐⭐⭐4/5 stars | B2B sales teams that seek to identify and prioritize high-quality leads using AI-powered scoring and intent signals. |
ToolApollo.io Standout FeaturesPeopleCompanyDealsWorkflowCalls Ease Of UseComplex Personal Rating⭐⭐⭐⭐4/5 stars Best ForB2B sales teams that seek to identify and prioritize high-quality leads using AI-powered scoring and intent signals. | ||||
Fillout | FormResultsSchedulingWorkflowZite | Easy | ⭐⭐⭐⭐4.5/5 | Fillout is best for marketers who seek to create custom, multi-step forms with advanced logic to capture and qualify leads efficiently. |
ToolFillout Standout FeaturesFormResultsSchedulingWorkflowZite Ease Of UseEasy Personal Rating⭐⭐⭐⭐4.5/5 Best ForFillout is best for marketers who seek to create custom, multi-step forms with advanced logic to capture and qualify leads efficiently. | ||||
Optinmonster | CampaignLeadsFormsFloating barsLightbox popupsCountdown timers | Moderate | ⭐⭐⭐⭐ 4.4/5 | Marketers who get steady traffic and want to capture leads on their website using behaviour-based popups. |
ToolOptinmonster Standout FeaturesCampaignLeadsFormsFloating barsLightbox popupsCountdown timers Ease Of UseModerate Personal Rating⭐⭐⭐⭐ 4.4/5 Best ForMarketers who get steady traffic and want to capture leads on their website using behaviour-based popups. | ||||
Intercom | Fin AI AgentContactReportInboxKnowledge | Complex | ⭐⭐⭐⭐ 4.4/5 | Businesses that want to capture leads through customer support forms and AI chatbots. |
ToolIntercom Standout FeaturesFin AI AgentContactReportInboxKnowledge Ease Of UseComplex Personal Rating⭐⭐⭐⭐ 4.4/5 Best ForBusinesses that want to capture leads through customer support forms and AI chatbots. | ||||
Mailerlite | FormsSubscriberDashboardAutomationCampaign | Very Easy | ⭐⭐⭐⭐ 4.3/5 | Businesses that seek to capture leads through forms and engage them with email campaigns. |
ToolMailerlite Standout FeaturesFormsSubscriberDashboardAutomationCampaign Ease Of UseVery Easy Personal Rating⭐⭐⭐⭐ 4.3/5 Best ForBusinesses that seek to capture leads through forms and engage them with email campaigns. | ||||
SurveyMonkey | SurveysResults AnalyserContactsIntegrations | Moderate | ⭐⭐⭐ 3.9/5 | Marketers who seek to collect targeted consumer insights using advanced surveys. |
ToolSurveyMonkey Standout FeaturesSurveysResults AnalyserContactsIntegrations Ease Of UseModerate Personal Rating⭐⭐⭐ 3.9/5 Best ForMarketers who seek to collect targeted consumer insights using advanced surveys. | ||||
Poptin | FormLeadsCouponsDisplay RulesSegments | Easy | ⭐⭐⭐⭐ 4.2/5 | E-commerce marketers who seek to capture leads through high-converting exit-intent popups. |
ToolPoptin Standout FeaturesFormLeadsCouponsDisplay RulesSegments Ease Of UseEasy Personal Rating⭐⭐⭐⭐ 4.2/5 Best ForE-commerce marketers who seek to capture leads through high-converting exit-intent popups. | ||||
9 Best Lead Capture Software
1. meetergo
Personal rating: ⭐⭐⭐⭐ 4.5/5 stars | Starting price: $0 | Integrates with Google, Outlook, Zoom, Slack, HubSpot, Salesforce | Best for small teams | Ideal for sales demos
The first lead capture software on this list is meetergo.

meetergo allows you to capture and qualify leads with the help of its Routing and Funnel feature. This feature lets you add a form field for custom questions, such as the lead’s name, email address, company, contact information, and service goals. It also lets you create conditional paths to direct visitors to different booking pages, meeting links, and hosts based on their responses.

meetergo's Meeting Types is another great feature that helps you create scheduling links when you select an availability, specify the meeting type (one-on-one or team meeting), add your team members, and select a hosting platform.

With the Contact feature, you can manage captured leads by their form responses, view their contact details, including names, emails, phone numbers, and meeting history, all in a single dashboard, and then schedule a meeting directly with leads.

You can also automate follow-up actions or reminders using meetergo’s Workflow feature. You only need to set rules, such as “when a meeting is booked” or “before a meeting starts”, and select a trigger, like sending emails or SMSs to hosts or attendees.

Let me guide you in setting up a routing form and funnel for capturing leads.
On your account homepage, click ‘Tools’ and select ‘Routing Forms & Funnels’ from the drop-down menu.

In the ‘Routing Forms & Funnels’ window, you may see already existing routes and funnels you can share, embed, or manage. However, you can create one from scratch by clicking ‘Create’.

Next, name your funnel and select your preferred funnel type. Then click the ‘New’ button.

This brings up the ‘Form and Funnel’ custom section, where you can rename your routing, enter the title, submit button text, and an optional slug, add an existing funnel to the form, or create a new funnel to help capture leads.

When you want to create a new field (Add a funnel slide), a new funnel set-up screen opens. Here, you label your field and add a description. A dropdown menu allows you to select the slide type from the options: checkbox, image, or icon.In this example, I selected the checkbox type, which allowed me to add more options and rename them.

A typical use case would be to create a marketing funnel with the checkbox option. This funnel would help qualify leads who need a marketing strategy, want their marketing services done, or want to audit and improve their marketing.
Once the funnel is live, the option they select will determine all of this.

Scrolling down, you see the form customisation section, which you can set up to capture leads. Here, default form fields like the name, email, and phone number are provided, and you can delete or edit each.
You can add an existing form or create a new form field.

For instance, my new form field lets you add fields like dropdowns, URL inputs, and multi-line inputs. Toggle options let you show only the funnel, block specific emails, and request the first and last name.

meetergo’s funnel has the ‘Routing logic’ for setting up routes to send leads to the right destination when they choose a specific tunnel.
An example is a route that sends leads to a marketing strategy meeting type schedule page when they choose “I need help with marketing strategy” in the tunnel.
To create your route logic, click ‘Create route’.

Your new route lets you set rules by adding conditions and specifying what happens next when those conditions are met, such as scheduling a meeting, displaying a custom message, or redirecting to a URL.
If you choose to schedule a meeting, you can select the type of meeting to schedule.

Let me use my first route as an example.
I set the condition that if option 1 (“I need help with marketing strategy”) is chosen in my funnel, the next step should be to schedule a meeting, and I indicated the meeting type.

This method allows you to add more routes for each tunnel option. You can copy, share, or embed the link to your new route on other social platforms when ready.

For instance, when you select “embed,” you have different kinds of embedding codes, such as Inline, pop-up, sidebar, and text pop-up, to choose from.

This is how my tunnel looks. It has checkbox options that direct leads to the right platform based on their choices.

Finally, meetergo helps you capture the lead by collecting their details before directing them.

For a clearer overview, check out this free video on the On-Site Appointment Scheduling Tool to see how routing works in meetergo.
Let me share more reasons that make meetergo one of the best lead capture software.
Don’t Lose Money By Not Capturing
Potential Customers!
Meetergo turns your traffic into booked meetings—right from your website. Capture leads, qualify them, and get on their calendar in one smooth flow.
Try meetergo for free today!
Booking + video conferencing in one tool.
Booking + video conferencing in one tool.
Features I Loved
1. Contacts
The contact feature in meetergo automatically captures and saves leads' information whenever they book a meeting, enabling you to access their history and all follow-up schedules.
You can integrate with tools like Hubspot to enable automatic sync.
To access the contact feature, click ‘Schedule’ on the main dashboard and select ‘Contact’ from the dropdown menu.

The contact section presents a list of leads, their names, email addresses, companies, and subsequent scheduled meetings.

When you click on a lead, you can view their contact details and other data, like their appointment history. Also, you can edit and delete your contacts, add notes and tags, schedule and message them.

2. Workflows
meetergo doesn't just help you capture leads; it allows you to automate tasks such as sending reminders or follow-ups to your leads or internal notifications once your lead books a meeting
You can access the workflow feature in the ‘Tools’ section on the main dashboard.

To create a new workflow, click ‘New’.

meetergo offers several templates, including reminders, follow-ups, and many more. However, our goal is to create a custom one, so click ‘Create custom workflow’.

While creating your workflow, you can set up your triggers and actions, rename the workflow, and assign a meeting type.
Let's go deeper into setting up the triggers and actions.

In this section, you set the trigger by selecting a scenario, like when a booking is made, before a meeting starts, or when a meeting is cancelled. You can also indicate a period for the scenario.
Next, select the action that should occur after the trigger. This could be sending emails or SMS to attendees.
You can add another action by clicking the ‘+’ button.

By saving your workflow, meetergo will display it in your list of workflows.

3. Meeting Links
Companies also choose meetergo as their lead capture software because it allows them to collect leads through booking pages.
The meeting links window contains existing meeting types, where you can turn each on or manage them.

To add a new meeting type, click ‘Create’.

Next, indicate if it should be hosted by a single host or team. In this case, I’ll go for a single host.

After that, you can choose a host to handle that type of meeting.

After choosing the host, the following step is to set up the meeting type.
Enter the title and description of your meeting type. You can customise its link and specify the duration in a fixed or flexible way.
Moving on, select a venue, such as Google Meet, Microsoft Teams, or a phone call, before publishing your meeting type.
After publishing, you can share your booking page, copy the link, or preview it.

What I Liked vs What could improve
What I liked 👍
✅ It's user-friendly, and booking pages are easy to set up.
✅ Built-in video conferencing that works smoothly in a browser.
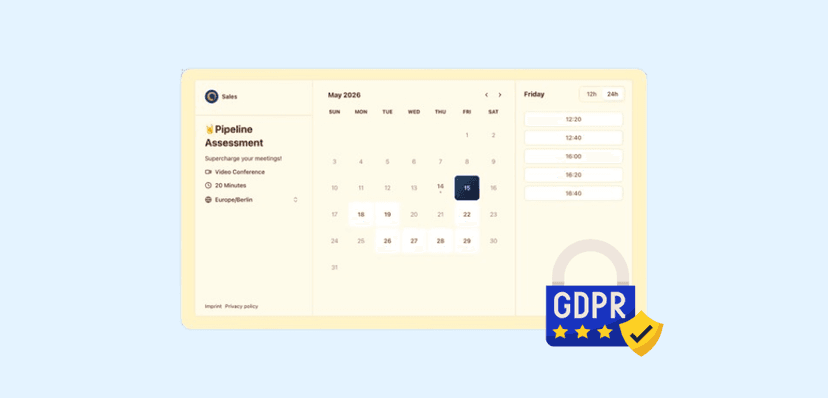
✅ Feels safer with its GDPR compliance, servers in Germany and cookie-free features
✅ Integrates well with many tools like Zapier, Stripe, HubSpot, Google Calendar, etc.
✅ Supports automations of reminders and follow-ups, and routing forms to qualify leads.
✅ It gives you the ability to control availability, buffer times and connect multiple calendars.
✅ Free plan with core features and affordable paid plans that start with €10 only.
What could improve 👎
❌ Has calgent©, an AI-scheduling feature, but limited to early access.
❌Some HubSpot integration features, like “team functions”, are not included in lower tiers.
❌ You can add personal introduction videos to your booking page, but only in paid plans.
Best For
- Meetgo is best for small business owners who seek to automate meeting scheduling by embedding custom booking widgets on their website.
Pricing
- Basic - Free/ per user [monthly billed]
- Essential - €10/ per user [monthly billed]
- Growth - €17/ per user [monthly billed]
- Teams - €40/ per team[monthly billed]

Don’t Lose Money By Not Capturing
Potential Customers!
Meetergo turns your traffic into booked meetings—right from your website. Capture leads, qualify them, and get on their calendar in one smooth flow.
Try meetergo for free today!
Booking + video conferencing in one tool.
Booking + video conferencing in one tool.
2. Hubspot Marketing Hub
Personal rating: ⭐⭐⭐⭐ 4.6/5 stars | Starting price: $0 | Integrates with Salesforce, Zapier, Gmail, Outlook, Slack, LinkedIn Ads, Facebook Ads | Best for scaling businesses | Ideal for marketing automation
Next on our list of the best lead capture software is HubSpot Marketing Hub.

It lets you build and customize forms by selecting the form type, using the form editor to add form fields like email, text, checkboxes, and dropdowns, and adjusting each field's properties.

Within the HubSpot Marketing Hub, an Email feature lets you create custom emails. You can choose a template, insert dynamic content, and schedule or send the emails manually to specific contacts. While this helps you engage existing contacts, many companies use the lead generation software to drive new contacts into their funnel first.

You can create and manage paid campaigns on the HubSpot Marketing Hub when you link your ad accounts, choose your audience target, upload creatives, and track performance using the Ads feature.

Moreover, you can create and set up registrations with HubSpot Marketing Hub's Events feature.
It allows you to create custom forms, send confirmation emails, and add event details like the time, location, and reminders.

Let's see how to create a form from Hubspot’s Marketing Hub.

The forms section contains existing forms, details like their page views, and spam submissions.
Click ‘Create form’ to start a new form.

Next, specify the form you wish to build, such as a standalone, embedded, or dropdown banner type. Then select the form editor.

After selecting how you want it, you can build your form from scratch or choose from a variety of templates, such as a newsletter form and a book a meeting form.
Select ‘Start from scratch’ to build your custom form.

Now, you will have access to the form-building area.
The tool area is at the far left end of the screen, where you build the form. At the right end, you can collaborate with the Copilot.
If you prefer to rename your form, click on the title.

When you click ‘Add to form’ from the tools section, you get access to form fields like email, single-line text, single and multi-checkboxes, and drop-down, which you can drag and drop into the form-building area.

Also, when you click on a specific form field, you can access its properties.
For instance, when you select a single-line text field, you can make it a requirement, label it, set its placeholder, hide its value, and much more.

The ‘Other’ section provides images, a header, recaptcha, and most importantly, data privacy that you can add to your form.

Moving to the next sub-feature, ‘Form Contents’. This one lets you access, navigate, and organise all the items on the form.

Other tools like logic let you add conditional logic and personalise the form to show only relevant questions. The styling tool is your go-to if you want to customise the appearance of your form with fonts, theme colours, etc.
Moreover, the Optimize tool helps you adjust your form for a better conversion rate and user experience.

Also, an automation tool lets you assign workflows to your form, such as sending follow-up messages after a lead fills out the form.

Furthermore, the tool section offers more customisations, like saving contacts even if the email is wrong, pre-filling fields for returning visitors, and adding the form to a marketing campaign.

Once your form is ready and published, you can obtain a shareable link and embed code. You can also integrate your form into Hubspot CMS or CTAS.

Finally, this is our form for capturing leads and qualifying them. Hubspot will automatically add your leads’ contacts to your Hubspot contact list.

There are more reasons why I added HubSpot Marketing Hub to my list of the best lead capture software.
Features I Loved
1. Lead Scoring
The Lead Scoring feature lets you create criteria and assign numerical points to each criterion so that Hubspot can use it to rank or score how qualified a lead is.
It's like setting a rule that if lead contacts match a specific job title, like CEO, they should have 10 points. Another rule could be that if their industry matches IT or marketing, they should be awarded 20 points. Hubspot calculates and uses these points to rank your lead contacts.
This helps your teams prioritise follow-ups and focus on leads most likely to convert.
Let's see how to create a sample lead scoring tool to prioritise our lead contacts.

Hubspot lets you create lead scoring from scratch or with AI.
First, select ‘Start from scratch’.

Next, you indicate if you want to score the contacts or companies and how you’d like to score them. In this case, select contacts and indicate you want a fit score because it aligns your contacts based on criteria.

Now you have access to your lead scoring setup screen.
In the criteria section, add a new property group. Within your property group, you can add objects like an associate deal, an associate ticket, and a contact.
Select ‘Contact’.

After selecting the contact, you can set the criteria using the contact properties.
For example, I set my rule that if a contact's job title is equal to positions like CEO, Director, and Project Manager, they should be awarded 10 points.

You can click ‘Add property criteria’ to add more scoring rules. For example, I added another rule that awards 10 points if the lead status is connected, open deal, or in progress.

The contact section also lets you specify the group of contacts to which the scoring should apply. You can let it apply to all contacts or a specific contact list.

The ‘Manage Score’ page allows you to provide a property label. You click on your lead scoring title to rename it.
You also review and activate it.

Your lead scoring can be added to a column on your contact table so you can order or sort it to know each contact's score.

Let’s view more features that make HubSpot one of the best lead capture software.
2. Campaign
HubSpot's campaign feature allows you to combine marketing assets like emails, tasks, landing pages, and ads into one campaign.
This helps you manage and track the entire performance of this collection campaign, including key metrics such as contacts generated, engagement, revenue, and website traffic.
An estimate shows that the Campaign feature has led to an 82% increase in lead generation. This feature lets you organise and generate reports on different assets on the same platform.

Let me give you more insight into the campaign feature and how you can create one from scratch.
You can locate the campaign feature within the Hubspot Marketing Hub.

Click ‘Create campaign’ in your campaign section to create a new one.

Next, you can start with a template or from scratch. In this example, I’ll create one from scratch.

When starting from scratch, you define your campaign by entering its name, choosing a colour, assigning an owner, and selecting its start and end dates.

Furthermore, define your campaign goals and audience, and add notes.

After defining your campaign, Hubspot takes you to your campaign platform.
First, we have the asset section where you add assets to the campaign. These assets include your forms, ads, CTAs, and marketing emails.

For instance, when you click add assets, you can locate marketing emails, add existing ones, or create one on the spot.

There is also the tasks section in your campaign platform, where you can create tasks by naming them, choosing a task type, such as a blog post, email, or landing page, setting a date range, and assigning them to a team member.

There is a performance section that provides important key metrics like ROI, web traffic, Influential contacts, and contact lifecycle count.
The ROI, for instance, shows your total campaign spending and the returning revenue, depending on the date range you set.

Stats like the web traffic show the number of sessions and new contacts. The contact lifecycle count shows the number of lead stages in a bar chart.
For instance, the influenced contact section shows four contacts engaged with one or more assets in this campaign.

The campaign also has an activity section to give you log details regarding your campaign.
You can select a date range to see activities during that period.
For example, this activity section shows Williams added a new marketing email to this campaign.

3. Ads
Also, the Ads feature in Hubspot’s Marketing Hub lets you connect your Google Ads, Facebook, or LinkedIn account so you can create, manage, and track ad campaigns.
It lets you see which ads generate leads, customers, or revenue.
You can enhance ad performance by tracking conversions and syncing audiences based on lifecycle stages or contact lists.

When using the Ads feature for the first time, you must connect your Facebook, LinkedIn, or Google Ads account to sync it.
Let's go with Facebook.

For Facebook, you have to grant Hubspot access, which includes managing your accounts, settings, and business.

After a successful connection, the platform will redirect you to the Hubspot Ad account settings, where you can select the account and enable auto-tracking.

Next, Hubspot allows you to add pages tied to your Facebook account, and set their sync option to news, recent leads, and many more.

For the following step, Hubspot allows you to select your Facebook pixel to track visitors to your account, page, or website.

You can view the ad platform now that you are done with the setup.
Under the ‘Manage’ tab, you can manage ads and activate each of them.
The tab has a dashboard that displays key metrics like ad impressions, clicks, contacts, and customers. It also lets you calculate your Return on Investment (ROI) from the total amount spent.
You can click ‘Create’ to add a new ad element.

The new element could be an ad campaign, audience, event, or goal.

The Audiences section lets you track existing audience groups. It shows the audience type, source, and ad account name. You can also create a new audience group by naming it, selecting a type, and selecting a source.

The Events tab also lets you access, manage, and activate existing events and create new ones.

Lastly, the Analyse tab gives an overview of your ad statistics.
It lets you select a date range, ad account, and status, then returns key metrics like ad impressions, clicks, and contacts.

There's more. It also presents stats like new contacts and customer growth in a bar chart.

What I Liked vs What could improve
What I liked 👍
✅ Offers all-in-one marketing and lead capture tools like landing pages, forms, and email campaigns.
✅ Has an in-built local CRM feature.
✅ Offers automation for follow-ups, nurturing, and segmentation.
✅ Provides strong analytics and reporting on forms and campaigns.
✅ Starts with a free plan, with scalable tiers as you grow.
What could improve 👎
❌ Customising email and landing pages feels limited unless you're on higher plans.
❌ Adding more marketing contacts increases costs.
❌ Steep learning curve beyond basic forms and landing pages.
Best For
- HubSpot Marketing Hub is best for marketers who seek to automate lead generation through integrated email marketing, landing pages, and CRM.
Pricing
- Free Tools - Free/ per user [monthly billed]
- Marketing Hub Starter - $20/ per user [monthly billed]
- Marketing Hub Platform - $20/ per user [monthly billed]
Marketing Hub Professional - $890/ per team [monthly billed]

3. Apollo.io
Personal rating: ⭐⭐⭐⭐ 4/5 stars | Starting price: $0 | Integrates with HubSpot, Salesforce, Gmail, Outlook, LinkedIn, Zapier | Best for mid-size teams | Ideal for outbound leads
Our next lead capture tool to explore is Apollo.io.

This lead capture platform enables you to gather ideal contacts in a structured table from Apollo's database. It uses filters to help you select their job titles, buying intent, persona, location, and many more within the People feature.

It is not limited to returning people. It also returns your ideal companies when you use the filter to select the company's industry, buying intent, technology, funding status, and many important properties using the Company feature.

Apollo also features Deals, which allow you to manage and track opportunities by creating deal records, setting stages, assigning owners, and linking contacts or companies to each deal.

Also, there is a workflow feature, which allows you to automate processes like adding qualified leads to a prospect list by letting you define triggers, apply filters, and add actions such as enrolling contacts into sequences, updating fields, or branching logic.

Since the People feature is key to capturing leads, I will guide you as we explore and use it to gather leads.

To capture your leads, the People feature has a filter tool that lets you create criteria and then returns a list of leads that match those criteria.
This filter lets you filter leads’ lists, persona, buying intent, company, industry, while giving you the number of total, new, and saved as you filter.

For example, expanding the persona filter returns leads from marketing managers, IT directors, or operations managers, allowing you to add more personas.

After creating and submitting your criteria, Apollo’s system returns matching results of leads, including their details like job title, company, emails, and phone numbers.
You can access their phone numbers and emails, and perform actions like creating a sequence.

Additional details such as their location, number of employees, industries, and company keywords are key for more information about your leads.

With the returned leads, Apollo.io lets you switch views, hide the filter, and search through the list. It also enables you to save the list as a new search, sort through it, and create a workflow with the list, like a follow-up sequence.

You click on a lead to get more details.
It shows you their contact information, such as email address and phone number, and their insight, such as score, job postings, news, and technologies.

Further down, you can get their work history and more info about their company to take cues from.

To add the lead to your existing list, click “Add to list”, then select the list from the dropdown menu before confirming.

You can also name your search and save it.

Let’s continue with more features that made me add Apollo.io to my list of lead capture tools.
Key Features
1. Companies
Like the people feature, the companies feature also returns companies after applying its filter.
You can use it to find, target, and research businesses based on their attributes, such as industry, revenue, employee count, technologies used, and location. You can save the results for outreach or tracking.
You can also select each company to view detailed company profiles, including hiring trends, tech stack, and key decision-makers.
Let me take you through the Companies feature.

The Companies filter lets you create criteria by filtering the list by company, industry, and keyword while returning their total numbers, net new, and saved numbers.

When you expand the Signals feature, for instance, it returns companies with rapid growth.

Based on your criteria, Apollo returns a list of companies and their details, such as accessible links and the number of employees. You can take actions like saving each company.

But there is more. Apollo returns companies’ details like their industries, keywords, and location.
For instance, my search returned OpenAI, which belongs to the research industry.

When you select a company, you can access its overview section, which displays its contact information, such as subsidiaries, keywords, industry, and insights. It also includes scores, news, funding rounds, and job postings.

You can also access the company’s employees, recommendations, and location sections for further details. Apollo permits you to add the company to the list and save it.

2. Deals
The Deals feature, briefly mentioned earlier, allows you to create and manage sales opportunities and link them to contacts and companies. This helps you track the progress of your leads and organize outreach efforts based on deal status.
Let's get right into the details of the Deals feature.

When using the deals feature for the first time, it's always empty.
To add your deals, Apollo lets you create or import deals from an external source in CSV format.

After importing or creating your deals, you’ll find them in the deals section along with company, stage, and pipeline details.
Here, you can sort your deal list by pipeline, deals, and company. You can also save the list as a new view.

When you select a deal, you can view its deal information, such as the amount and probability, activity history, and record details, like stage and pipeline.
You can make changes to these details or add more information.

Also, there is a log activity that lets you add the deal to a task, note, call log, and conversation.

3. Sequence
Sequences is another reason Apollo.io deserves to be among the best lead capture software.
The Sequences feature in Apollo enables you to automate tasks to follow up with leads as time progresses.
With it, you can create sequential tasks, such as sending a series of emails for each day or week and interacting with LinkedIn connections, and then schedule them with delays in between.
With this, you can ensure there is consistent follow-up.
Let me explore this feature with you.

Access the sequence section and click ‘Create Sequence’ to create a new sequence.

Next, Apollo.io lets you build with AI, templates, clone, and start from scratch.
You can opt to start ‘From scratch’.

This will lead you to a sequence set up where you enter your sequence name and select from a list of available schedules.

Now that you have created your sequence, Apollo will take you to its overview section, which is empty. You have to add a workflow.
To do this, click ‘Add a step’.

Apollo.io has many tasks you can add as steps. These include manual and automatic email, action items, and sending LinkedIn messages to your leads.
In this case, you locate and select the LinkedIn connection request automation. Once saved, it automatically sends an invitation to your contacts.
This is best for the first impression.

After selecting your LinkedIn request automation, you have to set it up. Indicate the period for sending a connection if a contact is added.
Go ahead and set your priority from high to low and add a note or description to the step.

In the next stage, draft an optional connection request using tools like a placeholder and a snippet.
The draft page also lets you add meetings and start with templates.

After you complete the step, it will be a part of your sequence, where you can activate it.
Your sequence section provides real-time overall statistics of your automation, such as the number of active ones, bounced ones, and not sent ones.
There are email statistics that tell you the number of emails scheduled, delivered, replied to, and many more.
You can add more sequential automation to your sequence by clicking ‘Add a step’.

What I Liked vs What could improve
What I liked 👍
✅ It can generate over 200 million large, rich contact & company database based on your criteria.
✅ Integrates well with specific CRMs like HubSpot and Salesforce, and automation tools like Zapier.
✅ It offers automation and sequencing to create outreach sequences, set follow-ups, and reminders.
✅ It provides lead enrichment and data hygiene.
✅ You can see your leads' buying intent, their site visit, enrichment and trigger workflows.
What could improve 👎
❌ Users without much business experience may struggle with this tool.
❌ Inconsistent data for certain geographies or less common job titles/titles.
❌ Free and lower tiers are credit-limited.
Best For
- Apollo.io is best for sales teams who seek to automate lead generation and prospecting by accessing a vast database of contacts and companies with advanced filtering tools.
Pricing
- Free Tools - Free/ per user [monthly billed]
- Basic - $59/ per user [monthly billed]
- Professional - $99/ per user [monthly billed]
Organization - $149/ per team [monthly billed]

4. Fillout
Personal rating: ⭐⭐⭐⭐ 4.5/5 stars | Starting price: $0 | Integrates with Airtable, Notion, Google Sheets, Slack, Make, Zapier | Best for small teams | Ideal for custom forms
Up next, we explore Fillout, a form builder platform.

This form builder allows you to create your custom form by starting with a template or a blank form, dragging and dropping form elements, selecting logic to be added, and styling it with brand colours and themes.

When you publish your form, Fillout provides a Results section that collects submitted responses and lets you filter them, view each lead's answers, and view key metrics like form completion rate and analytics like a line chart to track form engagement.

You can grant Fillout permission to connect and sync your Calendar account, select meeting type and meeting duration, and proceed to add field elements and themes to create a booking page using the Scheduling form feature.

Lastly, Fillout's workflow lets you automate tasks by selecting a trigger, such as submitting or canceling a form, and selecting an action, such as sending an alert to Slack or an email.

Navigate to the forms from the home dashboard and click ‘Make a Fillout’.

The Fillout lets you create a form, a schedule, a payment form, a PDF, and a workflow.
To proceed to the form, access the form section where you can start with a blank form, template, import, and connect your form.
In this case, select the blank form.

The next stage lets you choose a theme for your form. You can also choose to start without a theme and make your own.

Name the form you are about to create.

After naming your form, you can customize it with sections such as edit, integrate, share, and settings.

To build your form, select the edit tab.
The edit section provides form elements like short answer, email input, multiple choice, dropdown, file uploader, and currency, which you drag and drop on the form-building area.
There is also a theme to select from and an AI tool to help you build a form with a prompt.

When you add a field like the short answer input, you can access its properties by clicking its settings, as demonstrated below.
The properties let you configure its basics, logics, and validation.

For instance, when you expand the basics, you can enter that field's caption, placeholder, and default value.
Interestingly, you can set the field as required or make it half-width.

Fillout allows you to continue to add other elements, such as an email input field and a dropdown field, to collect information from leads.
You can also select a theme to enhance the appearance.

At the bottom of the edit screen is the ‘Add Page’ button, which allows you to add more pages for more form content, and the ‘Logic’ button, which lets you set up the form's logic flow.
You can preview or publish your form from here if it's ready.

When you select the logic, for instance, you access Canvas, connecting your form pages according to how you want them to flow from start to end.
It also has a calculation section where you can set up your form to calculate input digits when certain conditions are met.

Shifting away from the edit section, there is the integration section, where you can select third-party apps like Google Sheets and Hubspot to integrate with your form to collect and save leads' information.

The integration section also lets you assign a pre-made workflow to your form, such as a thank-you email after submission and an email indicating approval of the form.
You can also create a custom workflow from this section.

The settings section also allows you to set up your form’s notification, behaviour, access, and more.
The form behaviour, for instance, lets you set the form language, enable cookie consent, enable auto translation, enable form resumption, show a progress bar, and more.

After publishing, you can access your link options in the share section. In this section, you can access the form link, its embed code, and customise the link.
The embed option, for instance, provides standard, pop-up, and fullscreen options for you to copy and embed into your website.

This screenshot shows my published standalone lead collector form, which collects lead information such as name, company, business email, and services they are interested in.

Features I Loved
1. Results
Fillout has a Results feature for every form, as explored earlier.
This feature collects submissions, structures them, and allows you to track and review them.
It lets us track incomplete responses under In Progress and view response breakdowns in Summary. It also provides visual insights through Analytics and allows us to create custom data views using Add View.

The results section lets you view collected submissions in table form.
This table displays details such as the date and time of submission and form fields submitted, such as email input and dropdown choices.
For example, mine displays my full name, company, and business email, which correspond with my form.
You can also sort, filter, or use a date range to navigate.

The summary section gives a statistical overview of each form field's information submitted, like the completed percentage of a form field and recurring leads.
For instance, in the screenshot, the Full name field was completed 19 times out of 19 attempts.
You can convert it to a pie chart.

This is where you can access the percentage of leads who chose a certain dropdown choice.
42% of the leads chose branding and creative services on the form.

The Analytics provides key metrics like completion rate and submission number. It also displays visual analytics, such as a line chart.
In my case, my key metrics suggest that my form was started 150 times and was finished 111 times, making the completion rate 73.51%
Also, the line chart shows that my form was completed 30 times on December 1.

2. Workflow
The workflow feature in Fillout allows you to set up automation when an action is triggered.
You can use it for tasks such as sending alerts on Slack if the form is abandoned, sending follow-up messages after submissions, and requesting approvals via Slack.
This reduces manual work and lets you handle form data efficiently.
Follow me as I guide you through using the workflow to send follow-up messages to leads and alert Slack whenever there is a form submission.
On your home dashboard, navigate to the workflows tab and click ‘Blank workflow’ to create a new workflow.

Next, select a form to which you want to apply the workflow.

After selecting your form, access the workflow builder canvas. Next, click ‘Select a trigger’. I chose to select ‘Form submitted’ as my trigger.
There are also other triggers, like cancelled and rescheduled events.

After the form submission trigger, select an action.

You can choose from many app actions, such as approval, filter, Microsoft Teams, and Slack.
Select ‘Send email’ as an action.

Next, configure your email recipients. This is where you select the email placeholder for where the email will go, and enter the email's subject.
Afterwards, select your Gmail account.

Switch to the email section to draft your email. You can add placeholders from your form to the email's content.

Now you are done sending the email. To add the Slack alert action, click the ‘+’ icon.

Next, locate and select Slack.

Choose your Slack account.

Once through, set up the Slack action. Here, you select your Slack channel to send the alert. You can also add a custom message to send as an alert.
With placeholders or references, you can draft an alert message that includes the lead's name, email, and other information.

The form submission trigger, email sending, and Slack alert action are now complete. Select your workflow title to rename it, and then test or publish it.

You can access your workflow in your assigned form.

3. Schedule
The Scheduling Form feature in Fillout allows you to create and customise your booking page and form so clients and leads can schedule meetings.
You must connect a Google or Outlook account to sync your calendar's availability and avoid double-booking.
Fillout also allows you to add payment and automation to your booking page form.
Let us explore how to create a custom booking page for a one-on-one meeting.

To create your new Scheduling form, navigate to your schedule section and click “Scheduling Form”.

You must connect your Google or Outlook calendar account when it's your first time.

If you choose Google Calendar, you select your Google account and set permissions for Fillout to access, view, and edit events on all your Google calendars.

Fillout lets you create a meeting type before creating its custom booking page. You can choose from one-on-one, group, and round-robin meetings.
For the guide, select one-on-one.

Next, you set up your one-on-one meeting, enter your meeting title, customise your meeting link, and indicate the duration.
You also select a location, be it in person, by phone, or on a conference platform like Google Meet, Zoom, or Microsoft Meet.

After creating your meeting type, it sends you to the form editor page where you first name your form.

In the form editor, you can set up the events’ general settings, organiser, availability, etc.
The general setting, for instance, lets you edit the event type, title, duration, and location.

The Booking page section lets you set up the display and add form fields to the booking page form.
The editor section also lets you select from various themes to apply to your booking page.

After publishing, you can access the form link and the embed code within the share section.

Your booking page structure should look similar to mine. My booking page screenshot shows details like meeting information and availability to choose from.

What I Liked vs What could improve
What I liked 👍
✅ Offers a very smooth and clean UI.
✅ It integrates well with tools like Airtable, Notion, Google Sheets, and webhooks.
✅ Offers advanced logic and fields like conditional logic, calculations, and special field types
✅ Provides advanced form customisation and aesthetics.
✅ Offers many useful features on a free plan.It gives smooth form building experience especially with its drag and drop style.
What could improve 👎
❌ It lacks billing management and receipts and you may need to manually export them.
❌ Advanced integrations, customization, and more responses per month cost more.
❌ If you accidentally close a tab or refresh without publishing or saving your edit, you lose it.
Best For
Fillout is best for marketers who seek to create custom, multi-step forms with advanced logic to capture and qualify leads efficiently.
Pricing
- Free - Free/ per user [monthly billed]
- Starter - $19/ per user [monthly billed]
- Pro - $49/ per user [monthly billed]
- Business - $89/ per team [monthly billed]

5. Optinmonster
Personal rating: ⭐⭐⭐⭐ 4.4/5 stars | Starting price: $7/ month | Integrates with WordPress, Shopify, HubSpot, Mailchimp, Zapier | Best for midsize teams | Ideal for website leads
The next tool in our lead capture software lineup is OptinMonster.

This tool has a Campaign feature that lets you build a form or a targeted pop-up by choosing a campaign type, dragging and dropping elements like form fields, buttons, and texts, assigning triggers, and setting up display rules based on visitor behavior.

Its Leads feature lets you monitor collected leads by opening the Leads dashboard, filtering by campaign or date, and exporting the contact data.
That is not all. The Campaign Triggers tool allows you to set behavioral conditions using rules like the period spent on the page, device type, or referral source.
Let's discuss how OptinMonster’s Campaign feature helps you create pop-ups to capture leads (subscribers) who visit your website or page.

Under the Campaign Tab, click “Create New Campaign” to start a new one.

OptinMonster lets you create your campaign with playbooks, templates, or a canvas where you can start from scratch. For full customisation, select “Canvas”.

Next, you can select your campaign type, such as pop-up, inline, slide, floating, or fullscreen.
I chose the full-screen campaign type in this example.

Name your campaign and select an existing website on which to use the campaign.

You now have access to the campaign builder canvas. The design section is where you build your campaign.On the left side of your screen, there are various elements you can use to build your campaign. These include columns, images, text, embed forms, HTML, video, etc. To use any of these elements, simply drag and drop them on the canvas area.
For instance, you can drag and drop the text element onto your canvas. OptinMonster allows you to adjust properties of your text, such as the font colour, size, and alignment.

Afterwards, I added the yes/no element. You can customize the text on the buttons, indicate what happens if “Yes” is clicked, and specify the next action, which could be redirecting your visitors to a particular page.

After that, select the next view (page) at the bottom of your screen and set up the form to collect your leads’ details, such as their name and email address.
You can always add more views or pages depending on the product you want to show your leads or the details you want to collect.

Under the “Display Rules” tab, OptinMonster allows you to add rules or a logic to follow. First, the conditions sub-section is where you can set the conditions that should be met for the pop-up to show up for the user on the website, and what view (page) should pop up.Below this section are options to add more rules or a new rule group.

Regarding the conditions, there is a search bar where you can search for the right condition to use based on personalization(who), triggers(when), targeting(where), and more. This comes in handy for setting up a workflow.
For example, I can set up a “Who” rule to set conditions like showing the pop-up campaign if the visitor is from a specific location, website, or browsing with a particular device.

The “Action” tab at the base of your screen contains elements that help you choose what happens when the campaign meets the conditions you set.Here, you can select how it captures the visitor’s attention. This could be an animation with any MonsterEffect, like ‘Bounce’, and a sound like ‘Ping’.You can also toggle on or off the options to display a page slide and to close the campaign page when a visitor clicks on the site background.

Moreover, the integrations tab lets you search, select, and integrate Customer Relationship Management platforms (CRMs), like Hubspot, into your campaign.

In the “Analytics” section, you can use OptinMonster Analytics or connect other analytics tools like Google Analytics to your campaign.

Last but not least is the “Publish” tab. It lets you publish or schedule your campaign, enter your website URL to test your campaign, and add a website.

With your lead capture form ready, you can copy the link, share it, or embed it on your website. If your site is on WordPress, Shopify, or WooCommerce, OptinMonster provides custom embed links you can copy and use specifically for those platforms.

Let’s discuss more features that make Optinmonster one of the most popular lead capture software.
Features I Loved
1. Lead Verification
After you launch your lead capture campaign, your leads may start rolling in, but not all of them will be legitimate. Some may be fake bots or low-quality leads.
This is where OptinMonster’s Lead Verification comes in. It lets you create a filter to only take in credible leads and block suspicious leads. OptinMonster uses its TruLead™ technology to check email addresses, IP reputation, and detect disposable or role-based emails, before entering your lead list.
With this, you end up with authentic leads.
To access the lead verification feature, click ‘Leads’ on the home screen dashboard, and select Lead Verification in the dropdown.

There are existing filters within the lead verification section that you can activate, edit, or delete.Click ‘Create New Filter’ to create one.

When creating a filter, you name it, activate its status, select your domains, and add the IP address you want the filter to block.

Furthermore, you enter strings or characters you wish to block, and a block pattern.
You can also activate the features that let it correct email automatically, block temporary, role-based, or free emails, run SMTP checks, and more.

After creating your filter, OptinMonster adds it to the filter list within lead verification, where you can activate, delete, or edit it.

2. MonsterLeads
When you finish launching your lead capture campaign, you can use MonsterLeads™, a feature in OptinMonster that stores all the leads you collect through your campaigns directly inside your account.
MonsterLeads allows you to monitor your leads' key details, such as name, email, location, device, and IP addresses, so that you can view and manage them anytime.
Moreover, it allows you to easily access your leads, export, and filter through them, even if you are not connected to an email service provider.
To access the MonsterLeads™ feature, click the ‘Leads’ tab and select it from the dropdown menu.
If this is your first time, OptinMonster will send you to the integration screen, where you install and configure MonsterLeads.

On the configuration screen, select the notification type, add the email address to receive the alert, and indicate if it should also save their IP addresses.

Your collected leads' info is stored in the Monster Leads list, where you can view their info and email them directly.

Also, you filter a list by name, email address, phone and many more before exporting them.
What I Liked vs What could improve
What I liked 👍
✅ Responsive drag and drop form and campaign builder, which is easy for first-time users.
✅ Offers a variety of form types like Inline, sidebar,
lightbox popups, fullscreen and floating bars forms.
✅ Advanced customisation of form fields like styling, custom field labels, placeholder text, and integration mapping.
✅ Very strong on email marketing platforms like Mailchimp and ConvertKit, and has solid ecommerce support.
✅ Allows you to send captured leads to more than one place automatically.
✅ You can embed forms built elsewhere, like HubSpot, into a campaign using the embed code blocks.
What could improve 👎
❌ Limited options to qualify or screen leads before they submit.
❌ No built-in SLA or follow-up rules to reassign leads if reps don’t act.
❌ Fallback routing needs manual setup with webhooks or integrations.
Best For
- OptinMonster is best for website owners who get steady traffic and want to capture leads using behaviour-based popups that show at the right moment.
Pricing
- Basic - $7/per user [annually billed]
- Plus - $19/per user [annually billed]
- Pro - $29/per user [annually billed]
- Growth - $49/per user [annually billed]

6. Intercom
Personal rating: ⭐⭐⭐⭐ 4.4/5 stars | Starting price: $39/mo | Integrates with HubSpot, Salesforce, Slack, Stripe, Zapier, Shopify, Google Analytics | Best for mid to large teams | Ideal live chat leads.
I want to share more lead capture tools that are worth considering, such as Intercom, a customer service platform.

This platform has the Fin AI Agent chatbot, which you can set up to capture lead data by selecting the customer visitation trigger, adding welcome actions, and asking for details like the email and name.

The Intercom Contact feature collects submitted lead info, letting you switch to leads to see active or new ones, their companies, and conversations with the Fin AI Agent chatbot. You can also view and edit their full details.

Intercom also lets you monitor your lead capture’s (Fin AI Agent chatbot) performance by providing key metrics like Fin AI Agent answer, deflection, and resolution rate, a Sankey diagram showing your bot's reply and close rate, and a line chart showing the growth or decline of bot engagement using the Reports feature.

It also has the Inbox feature, which lets you reply to incoming messages by assigning chats to an agent, tagging issues like billing or bugs, adding private notes, and using macros like “refund approved” to respond faster.

When capturing leads, you can set up the Fin AI Agent's workflow to collect information from visitors who visit your website and agree to subscribe.
Come along and let me show you how you can create this workflow.
First, select Fin AI Agent from the feature menu.

Then, locate and click on “Workflows”.

Click the new workflow dropdown menu button on the workflow screen to create a new workflow. You can either create one from scratch or use an already existing template.

Intercom offers you triggers you would like to use. Here, select the page visitation trigger from the start of the conversation group. This would trigger the chatbot when someone visits the website.

Next, access the canvas to set up the workflow. First, click on the customer visitation trigger to set it up.

In the customer visitation trigger set up, you can ensure your workflow shows until it is seen, and through any channel (e.g., Web).You can also set rules on when and where the trigger sends your visitors, add an audience type, and enable the workflow for a specific period.

For the action, you can add a call-to-action message to capture your leads and then add a reply button. Intercom lets you choose the text your visitors will see on the reply button.

After the call to action, click the next arrow to add the workflow's next step. Since the goal is to create a workflow for capturing leads, locate and select the “Collect data” option.

In your data collection action, you can select an attribute, which is basically a form field.

In the data fields list, select the email field.

Select “Add step” after adding the email field to insert more actions into the data collection.

Other data fields you can include are the name, email address, company name, and a short description.

Finally, once you are satisfied with your workflow, select “Close” as the next step. This will end the workflow.

You can add a message to the close action to show a successful submission before ending the workflow.

And there you have it. Your workflow can now go live. When it does, Intercom provides a dashboard that showcases metrics like engagement and completion rate, workflow performance, and leads collected.

Features I Loved
1. Contact
Whenever visitors interact with your Fin AI agent, like submitting their details, their data is saved within Intercom’s Contact feature, turning them into leads.
These leads can be saved as people or companies and grouped into active and new categories.

For instance, when you select active contacts, you can view your leads list. Here, you can access important lead data such as the total number of leads, their name, company, type, last seen, and first seen.

That's not all. You can switch from the list view to the map view to see the location of your leads on a live map. You can also message your leads, tag the list, etc.

When you select a lead or a contact from the list, you can view details such as their location, email, user ID, messages, and recent events.You can also start a conversation with your leads by clicking the “New Conversation” button.

2. Reports
The Intercom report feature provides analytics of your conversations with leads, the performance of your teams, the overall activities of Fin AI Agents, and more.
These analytics allow you to monitor key performance metrics to help you make informed decisions.

When you access the reports overview, you can see the Sankey diagram showing how you handle your conversations. This includes the percentage of replies and conversation rates by your team and the chatbot.

There is also your overall growth line chart that you can use to check growth patterns over specific periods.

But there is more. The reports feature also provides metrics on your teammates' performance, like their median response time, handling time, and closing time.

What I Liked vs What could improve
What I liked 👍
✅ The Flow Builder makes it simple to design lead-capture chats without coding.
✅ Comes with "Fin", an AI agent you train to handle common questions quickly.
✅ The chat widget feels smooth and clean, making it easier for leads to use.
✅ Ability to task bots to ask screening questions, collect emails or phone numbers, and qualify leads.
✅ It integrates well with CRMs, automations and marketing tools like HubSpot, Salesforce, Marketo, Clearbit, Slack, and Zapier to flow leads into other systems.
✅ The knowledge base connects with chat, for leads to get instant answers automatically.
✅ All-in-one tool for support, chat, marketing, and onboarding.
What could improve 👎
❌ It quickly gets expensive even for small teams.
❌ The setup is complex, and it takes time to learn.
❌ You may struggle if you are not tech-savvy or have no AI agent experience.
❌ The reporting and analytics feel limited, especially when slicing lead data or exporting exactly what you want.
Best For
- Intercom is best recommended for businesses that want to capture leads through customer support forms and AI chatbots.
Pricing
- Essential - $39/ per user [monthly billed]
- Advanced - $99/ per team [monthly billed]
- Expert - $139/ per team [monthly billed]

7. MailerLite
Personal rating: ⭐⭐⭐⭐ 4.3/5 stars | Starting price: $0 | Integrates with Shopify, WooCommerce, Zapier, WordPress, HubSpot, Stripe | Best for small teams | Ideal for email capture
Next on our list of the best lead capture software ist is MailerLite.

This email marketing platform lets you collect leads by creating forms. You indicate the form type, like a popup, name its title, drag and drop elements like form fields, buttons, and text on its canvas, edit the form fields, select brand colors and theme, and assign it to a subscriber group before publishing it.

After launching your form, the Subscribers feature lets you manage collected leads and contacts. Here, you can view and create segments by signup source, assign tags, and view your subscribers' recent activity.

MailerLite's Dashboard feature allows you to monitor your form's performance. It lets you view key metrics like the number of collected subscribers, popups, and conversion rate, as well as a line chart that displays the growth of your visitors and subscribers.

Moreover, with the Automation feature, you can set email flows by selecting triggers when a form is submitted or adding actions like sending an email.

The form feature in MailerLite is quite helpful in capturing leads, so I will guide you through creating one while we explore this feature.
First of all, select “Forms” from the feature menu.

Next, name your form and select the form type. I’ll go for the pop-up form type.

Next, select the subscriber group you want to assign your new form to.

After you select your subscriber group, you will arrive at the Pop-up design section with templates. However, you can choose to build from scratch.

On the form builder screen, you can build your form using any of the available elements, such as the header, text, email field, and call-to-action button.

Below the elements icon is the style icon. Select it to access features that will help you further design your pop-up form, such as the font family, background color, heading color, text color, and border color.

After adding elements and setting your style, select your preferred pop-up type. There are five types, and you can adjust the width and alignment.

For your preferred background style, select the color, add an image and a shadow, and adjust the backdrop's capacity.

To set up your success screen after submission, switch to the success tab and add preferred elements like text, social media icons, and many more.

After customizing your pop-up form, proceed to set up your pop-up form behaviour.In this section, you can indicate the length of time it should take for your pop-up to appear on the website and its frequency.

Furthermore, you can also set your pop-up timing and its visibility based on your preference.

Under Setup, select the JavaScript snippet tab and copy the code for your pop-up form.

After creating your pop-up lead capture, you can explore other features such as analytics, automation, or double-opt-in.

What other reasons made me add MailerLite to this list of the best lead capture software?
Feature I loved
1. Analytics
To access your form’s analytics, locate and click the overview button on the “Forms” feature page.

Switch to your form’s analytics tab to view key metrics, such as the number of subscribers collected, the number of times it popped up, and the conversion rate.

When you scroll down, you can also view your form’s daily stats line graph, which displays the growth or decline of your visitors or subscribers.

Further down, you will find your subscribers' list. This list shows all your subscribers’ emails, the date they subscribed, and their IP addresses.

2. Subscribers
The subscribers feature lets you manage and organise the leads you capture via forms, sites, or campaigns. You can view all subscribers, segment, tag, create fields, view history, and group subscribers based on behaviour or demographics.

Here, Mailerlite lets you track your subscriber engagement, including the number of opens and clicks from your subscribers over time.

You can view and edit your subscriber data in segments.

Lastly, Mailerlite allows you to remove inactive subscribers by selecting a period during which they were not active or the number of emails they didn't respond to.

What I Liked vs What could improve
What I liked 👍
✅ It offers features like landing pages, forms, and simple automation on a free plan.
✅ Clean and simple editor where you can drag and drop blocks without tech skills.
✅ Allows you to host landing pages on MailerLite or your own domain.
✅ Works well with e-commerce tools like Shopify and WooCommerce, letting you capture leads, signups or abandoned carts.
✅ Lets you group leads and show different content to different people with segments and personalization.
✅ Easy and clean reports.
✅ Strict approval to prevent email from landing in leads' spam.
What could improve 👎
❌ Free plan lets you start from scratch, only without templates.
❌ Automation does not have advanced triggers or workflows, hence it feels basic.
❌ Lacks detailed reports, and you cannot filter or test emails as much as compared with other tools on the market.
Best For
- MailerLite is best recommended for businesses that seek to capture leads through forms and engage them with email campaigns.
Pricing
- Basic - Free/ per user [monthly billed]
- Growing Business - $10/ per team [monthly billed]
- Advanced - $20/ per team [monthly billed]

8. SurveyMonkey
Personal rating: ⭐⭐⭐ 3.9/5 stars | Starting price: $0 (limited) | Integrates with Zapier, HubSpot, Salesforce, Marketo, Slack, Stripe | Best for medium teams | Ideal for survey leads
Let’s continue our conversation on lead capture software and tools with SurveyMonkey, an online survey platform.

You use it to create structured surveys to capture leads. It lets you name your survey, indicate the survey type(e.g., form), and add content like questions, text, and pages. You can also customise each piece of content, choose a theme, and define its logic.

When you publish your survey, the Results Analyzer feature lets you see question summary data, such as the completion rate of the email field, insight data, total responses, and overall completion rates of a specific survey.

Additionally, the Contacts & Audience feature allows you to target specific groups by importing contact lists, segmenting them using custom tags, and sending reminders manually or via automation.

Also, every survey created has a Connect Apps feature that lets you integrate tools like Hubspot, Google Sheets, and Zapier by enabling you to log in to your account to connect them, map fields, or configure triggers for when new responses are received.

To create your SurveyMonkey form to capture your leads, click “Create Survey” on your account home screen.

Choose your preferred starting point. I decided to start from scratch.

Click the title on the survey design page to bring up the title option. Then, name your survey, select your preferred alignment, and set the category to form/ application type.

Afterward, go to the survey builder space, change the default form field’s type to a single textbox, and name it.

To make your email form field required, switch to the email field’s option and tick the ‘Require to answer’ box.

After completing your email field, you can click the next question button to add another form field, or select the add content option to add a question (or form field), text, or page break.

Again, you can add another form field depending on the information you want to obtain from your leads.

To enhance the aesthetics of your form, select ‘Themes’ under the style tab and choose your preferred theme, or create a custom theme.

Next, switch to the tab that allows you to collect responses and select the option that lets you send or share your form/ survey.

SurveyMonkey provides multiple ways to share your survey to collect responses. You can copy and share the link, embed it on a site, send it by text or email, or embed it in a mobile app.

When you choose the embed options, you can get your form’s regular survey, pop-up invitation, and pop-up survey embedding code.

Features I Loved
1. Analyze Results
After creating and sharing your lead capture survey forms, you can review and interpret the responses using this feature. It helps you filter, compare, and break down captured leads’ results by selecting specific questions, responses, or custom variables. If you want to analyze the results of your form, select your preferred form from the home dashboard.

Within your survey section, switch to the tabs that let you analyse results. There are tabs for question summaries, insight and data trends, individual responses, and a custom dashboard.

The insights and data trends tab shows the total responses, completion rate, and typical time spent on the form.

The response trends analytics is represented by a line chart, an area chart, or a column chart, depending on your selected chart type. It shows the number of responses per period.

Switch to the individual responses to view each of your leads' responses. You can view the respondent's status, the last time they modified the form, the time they spent on it, and the collector data.

2. Connect Apps
SurveyMonkey is not limited to just collecting and storing leads locally.
Thanks to the Connect Apps feature, you can map fields to connect your survey (form) to other platforms, such as CRMs like Hubspot, spreadsheets, email platforms, etc.
You can connect each existing survey to an app. Within your survey, go to the Connect Apps tab to begin.

Now choose an app, let's say Hubspot, and connect it.

SurveyMonkey will redirect you to a page where you can install HubSpot for the integration.

After installing, you can activate your integrated survey in your Hubspot-connected app.

What I Liked vs What could improve
What I liked 👍
✅ Comes with ready-made templates and many question types, set up forms quickly.
✅ Drag and drop to design, advanced form branding, and the use of logic to make smart forms.
✅ Forms are easy to share using various options: link, email, and embedding
Clear reports that update in real time.
✅ Integrates with over 200+ tools like CRMs, Stripe, HubSpot, Salesforce, and Zapier, to flow leads into your other systems.
What could improve 👎
❌ You can only collect a limited number of responses on the basic plan.
❌ You may find it confusing because you only learn mid-way that a feature needs a paid plan.
❌ On basic plan and some lower tiers, SurveyMonkey branding shows on your forms.
Best For
- SurveyMonkey is best recommended for marketers who seek to collect targeted consumer insights using advanced surveys.
Pricing
- Advantage Annual - $34/ per user [annually billed]
- Premier Annual - $99/ per user [annually billed]
- Team Advantage - $25/ per team[annually billed]
- Team Premier - $74/ per team [annually billed]
- Enterprise - custom pricing

9. Poptin
Personal rating: ⭐⭐⭐⭐ 4.2/5 stars | Starting price: $0 | Integrates with WordPress, Wix, Shopify, Mailchimp, HubSpot, Zapier | Best for small teams | Ideal for website popups lead
Last but not least among our best lead capture software is Poptin. It’s another form and pop-up builder tool that lets you collect leads.

Poptin's Form builder feature allows you to create a form for collecting leads by selecting a form type, adjusting the form's width and height, inserting elements like text and shapes, adding input fields, and setting rules to trigger actions.

The Leads feature displays reports on lead engagements, such as the number of new conversions and leads, and conversion sources (e.g., direct visits and search engines). You can also view lead details like names, emails, and submission times, which you can export to a CSV file or your connected apps.

With the Coupon feature, you can create coupons with discounts by naming the coupon, selecting the coupon type (e.g., unique or static), and inputting the coupon code.

There is more. Poptin allows you to control the pop-up visibility for visitors, where you set audience rules or criteria like their specific country, device type, visited URLS, and user behaviour.

Let's explore the form feature. I’ll show you how to use it to create a coupon form that collects leads.

To create your new form, click the “New Form” button in the top right corner of your screen.

Next, click “Start from scratch” to build your form from the ground up.

For your form details, enter your name and the domain you want to use, and activate the form.

On the form designer page, you can access the form settings, adjust the form's width and height, select your preferred position, and select the font type and background color.

Next, select the elements you want to add to your form. I used three elements in this example: a text, a timer, and a coupon.

After the text and timer, select the input field, add the email field to your form coupon, and customise it.

After designing, set your rules. Here, you can choose the type of user device on which you prefer the form to appear, set the display frequency, view a summary of your settings, and copy the embedded code.

After setting your rules, select a platform, such as WordPress, Wix, or a general website, where you wish to install your form and copy its code.

Features I Loved
1. Leads
The Leads feature on your home screen is the go-to feature for viewing your collected leads or tracking their statistics.
This is where leads' information collected via your form or pop-ups is stored. It has a dashboard that helps you track key metrics such as the pop-up and form engagement.Let us explore this feature.

First, there is the overview tab, which lets you view and track overall performance, including details like the new lead rate, conversion rate, social media rate, and direct visit rate.For example, my screenshot shows that 88% of my leads came from direct visits to where I embedded my form.

There is also a line graph next to the key metrics depicting the growth or decline of new conversions, leads, and clicks per day. You can also filter by time.

In addition, you can view the total number of conversions along with details like their submission date and time, email address, the conversion URL, or the pop-up they used.

2. Coupons
A coupon is an innovative way of driving more conversions and giving your visitors a good reason to sign up as leads. That's why 62% of online shoppers subscribe to email lists to get coupons.
Poptin lets you create custom coupons using the Coupons feature.
When creating coupons, you can add them to forms or pop-ups and monitor how each coupon is redeemed.
To create a coupon, select “Coupons” from your account homepage.

Next, click on the “New coupon”.

On the coupon setup screen, enter your coupon title, indicate the coupon code type, and enter the coupon you want to use.

After creating and submitting your coupon, you can activate it and monitor its connection and the remaining code in the Coupons section.

What I Liked vs What could improve
What I liked 👍
✅ You can set rules for popups to show at the right time.
✅ Offers ready-made templates you can customize.
✅ It is very simple to use, and you can build pop-ups and forms in minutes.
✅ The free tier works for small use, and paid tiers are cheaper than many others.
✅ It integrates well with tools like WordPress, Wix, Shopify, Mailchimp, and HubSpot.
✅ Variety of pop-up styles to choose from, like slide-ins, bars, lightbox, full screen, and even embedded forms.
What could improve 👎
❌ Designs don’t always look right on mobile if you built them on a desktop.
❌ Websites and advanced features are locked behind paid plans.
❌ Some templates, especially free ones, look a bit plain or generic.
Best For
- Poptin is best recommended for e-commerce marketers who seek to capture leads through high-converting exit-intent popups.
Pricing
- Free - Free/ per user [monthly billed]
- Basic - $25/ per user [monthly billed]
- Pro - $59/ per user [monthly billed]
- Agency - $119/ per team[monthly billed]

Use the Best Lead Capture Software
There you have it.
In this article, I shared the best lead capture tools, their features, and their pricing plans.
We saw how companies and organizations use meetergo to capture leads through appointment booking pages. I also explained how other businesses use HubSpot, Intercom, MailerLite, and more for the same purpose of capturing potential customers.
Unlike other articles that simply share tools without testing them, I shared screenshots of my testing. The goal was to show how much work we put into serving our readers at meetergo.
If you want to discover the top tools on the market, check out the following articles:
- Most popular lead qualification software in the market
- Best collaboration software for remote teams
- Best appointment scheduling software for small businesses
- Best meeting scheduler software for small and large businesses