Throughout my years of experience as a business owner, I’ve realized that one of the most challenging tasks in marketing is generating potential customers. And because marketers know this, about 50% of them treat generating leads as a priority, according to research.

They understand that you can’t sell anything if you don’t have anyone to sell to. In other words, no leads means no sales.
To get the best results, you must be keen about the tools you use to generate leads and the criteria you rely on to choose a lead generation tool. That sounds a bit overwhelming, but you don’t have to do all the thinking alone. I’m here to help!
I have tested various lead generation software, and in this article, I will discuss the best five with you. I will also provide a step-by-step guide on choosing the most suitable tool for your business needs.
Let’s dive in!
Best Lead Generation Software Compared
| Lead Generation Software | Standout Features | Ease Of Use | Personal Rating | Best For |
|---|---|---|---|---|
Pipedrive | CampaignLeadsActivitiesDeals | Easy | ⭐⭐⭐⭐ 4.5/5 stars | Businesses seeking ways to launch email marketing campaigns on a larger scale. |
Lead Generation SoftwarePipedrive Standout FeaturesCampaignLeadsActivitiesDeals Ease Of UseEasy Personal Rating⭐⭐⭐⭐ 4.5/5 stars Best ForBusinesses seeking ways to launch email marketing campaigns on a larger scale. | ||||
meetergo | Premium routing and Funnels; booking pages and workflows; Premium analytics | Very easy | ⭐⭐⭐⭐4.7/5 stars | Businesses and teams seeking to generate more leads through form links, create booking pages, and automate workflows. |
Lead Generation Softwaremeetergo Standout FeaturesPremium routing and Funnels; booking pages and workflows; Premium analytics Ease Of UseVery easy Personal Rating⭐⭐⭐⭐4.7/5 stars Best ForBusinesses and teams seeking to generate more leads through form links, create booking pages, and automate workflows. | ||||
HubSpot Marketing Hub | FormsTemplatesAdsCampaign | Moderate | ⭐⭐⭐⭐ 4.5/5 stars | Marketers and large businesses looking for an all-in-one platform for creating ads, forms, and emails. |
Lead Generation SoftwareHubSpot Marketing Hub Standout FeaturesFormsTemplatesAdsCampaign Ease Of UseModerate Personal Rating⭐⭐⭐⭐ 4.5/5 stars Best ForMarketers and large businesses looking for an all-in-one platform for creating ads, forms, and emails. | ||||
Apollo.io | DashboardPeopleMeetingSequence | Moderate | ⭐⭐⭐⭐ 4.2/5 stars | Businesses and sales teams seeking a platform that can research people with AI, create sequences, and build booking pages. |
Lead Generation SoftwareApollo.io Standout FeaturesDashboardPeopleMeetingSequence Ease Of UseModerate Personal Rating⭐⭐⭐⭐ 4.2/5 stars Best ForBusinesses and sales teams seeking a platform that can research people with AI, create sequences, and build booking pages. | ||||
Unbounce | Landing pagesPop-ups and sticky barsIntegrate AI-powered Smart copy | Easy | ⭐⭐⭐⭐ 4.1/5 stars | Businesses looking for a platform that can create landing pages and integrate with Hubspot, Slack, and Mailchimp. |
Lead Generation SoftwareUnbounce Standout FeaturesLanding pagesPop-ups and sticky barsIntegrate AI-powered Smart copy Ease Of UseEasy Personal Rating⭐⭐⭐⭐ 4.1/5 stars Best ForBusinesses looking for a platform that can create landing pages and integrate with Hubspot, Slack, and Mailchimp. | ||||
Albacross | Campaign Statistics Website PageBuyer persona | Easy | ⭐⭐⭐⭐ 3.8/5 stars | Marketing teams looking for a platform that can help start campaigns and track visitor intent level on their website. |
Lead Generation SoftwareAlbacross Standout FeaturesCampaign Statistics Website PageBuyer persona Ease Of UseEasy Personal Rating⭐⭐⭐⭐ 3.8/5 stars Best ForMarketing teams looking for a platform that can help start campaigns and track visitor intent level on their website. | ||||
Hunter.io | AssistantVerifierCampaignLeads | Very easy | ⭐⭐⭐⭐ 4.0/5 stars | B2B businesses and companies seeking a platform that can find, verify email addresses, and launch campaigns. |
Lead Generation SoftwareHunter.io Standout FeaturesAssistantVerifierCampaignLeads Ease Of UseVery easy Personal Rating⭐⭐⭐⭐ 4.0/5 stars Best ForB2B businesses and companies seeking a platform that can find, verify email addresses, and launch campaigns. | ||||
Delighted | Email metrics toolSurveysNet Promoter ScoreDashboard | Very easy | ⭐⭐⭐⭐ 4.0/5 stars | Small and large businesses looking for a platform that can gather and track customer feedback using NPS |
Lead Generation SoftwareDelighted Standout FeaturesEmail metrics toolSurveysNet Promoter ScoreDashboard Ease Of UseVery easy Personal Rating⭐⭐⭐⭐ 4.0/5 stars Best ForSmall and large businesses looking for a platform that can gather and track customer feedback using NPS | ||||
Canva | AppsAI featureTemplates Dashboard | Very easy | ⭐⭐⭐⭐ 4.3/5 stars | Small businesses, teams, and individuals that are seeking a platform that can create a wide range of content and use AI, such as Magic Edit and Magic Studio. |
Lead Generation SoftwareCanva Standout FeaturesAppsAI featureTemplates Dashboard Ease Of UseVery easy Personal Rating⭐⭐⭐⭐ 4.3/5 stars Best ForSmall businesses, teams, and individuals that are seeking a platform that can create a wide range of content and use AI, such as Magic Edit and Magic Studio. | ||||
Jotform | Form builderWorkflows Team workspaces | Easy | ⭐⭐⭐⭐⭐ 4.5/5 stars | E-commerce and businesses looking to collect data through forms and streamline their workflows. |
Lead Generation SoftwareJotform Standout FeaturesForm builderWorkflows Team workspaces Ease Of UseEasy Personal Rating⭐⭐⭐⭐⭐ 4.5/5 stars Best ForE-commerce and businesses looking to collect data through forms and streamline their workflows. | ||||
1. Pipedrive
Personal rating: ⭐⭐⭐⭐ 4.5/5 stars | Starting price: $14/month | Integrates with Google Workspace, Zapier, Slack, Mailchimp | Best for mid-sized teams | Ideal for visual pipeline lead tracking
First on this list is Pipedrive.

Using its Campaign feature, you can create email marketing campaigns by naming the campaign, adding contacts, selecting the sender, writing the subject and email content, and choosing the sending time.

Pipedrive allows you to add leads by inserting details such as their name, company name, email address, value in US dollars, label, expected close date, and the source channel.

That’s not all! Thanks to the Activity feature, you can set various activities, such as calls, meetings, tasks, deadlines, emails, and even lunch with your contacts or leads.

Last but not least, Pipedrive lets you create deals with details including the contact person, organization, title, and value. You must also choose the pipeline stage for the deal. It can be qualified, a contact made, a demo scheduled, a proposal made, or a negotiation started.

One of the ways you can grab attention using Pipedrive is through its Campaign feature. Let me show you how to go about it.
On the sidebar, click the “Campaign” icon.

I want to create an email marketing campaign, so I’ll select “Email campaigns” to set up a new one.

On the setup page, name your campaign, add your contacts (targets), and add a sender. I chose some recipients and added my sender details.

In the next interface, write the subject, choose your preferred email content, and then select the sending time.

Many email content templates are available, but I’ll use the “Offers (electronics)” template.

Once you have chosen your template, you can edit it, duplicate any section, or add your brand’s logo.

After I wrote my text, I decided to insert an action in the email: “Call now.” I chose “Make a call” as the link type in the settings and added my business number.

I also selected the X (Twitter) icon and added my URL in the settings.

Once everything is all set, you can send your campaign.

Your potential customers will receive the email, and if they’re interested, they’ll click the call to action.

In less than five minutes, I checked my campaign analytics and noticed that one lead had already opened the email.

This type of email marketing can generate many leads, especially when you have a large database. Now, let’s discuss other Pipedrive features.
Key Features
1 . Leads
A lead is a potential customer. Pipedrive's Lead feature allows you to add more leads and chat with them to maintain engagement.
To use this feature, locate the leads icon on the sidebar, and click “Lead” to add your lead.

You must fill out their information, which includes their name, company, email, value, label, to name a few.

After adding your lead, you can follow up periodically. Depending on their behaviour and signals, you can discard them.

2 . Activity
You can have contacts or leads, but what matters is keeping track of them and maintaining engagement. The activity feature lets you call, schedule meetings, tasks, deadlines, lunch, or even email your contacts.

If you want to set up an activity, click the “Activity” button.

Now you can name the activity, set its priority level, add the date and time, add guests, and also include the location and description, to name a few. Finally, save it and send it to your invitees.

Once a lead clicks on the meeting link, they’ll be taken to the booking page where they can choose the date and time of the meeting.

What I Liked vs What could improve
What I liked 👍
✅ Has an intuitive and well organised organised interface.
✅ Setting up campaigns and forms is easy and well-guided, especially for first-time users.
✅ It offers a variety of editable templates for forms and campaigns you can customise to suit your brand and style.
✅ It comes with filterable views to manage leads, which makes the learning curve low for your team.
✅ The visual pipeline lets you drag and drop leads to track their stages easily.
✅ Aside from its native features, it allows you to embed other varieties of lead capture tools like web forms and chatbots.
What could improve 👎
❌ Deeper analytics like the source of leads and conversion would have been nice to have. Without them the report feels basic.
❌ When my leads list got to over 10,000, I realised that the frequent API requests hit Pipedrive’s limits and slowed things down.
Best for
- Businesses seeking ways to launch email marketing campaigns on a larger scale.
Pricing
- Essentials: $14 per seat, per month (billed annually)
- Advanced: $39 per seat, per month (billed annually)
- Professional: $49 per seat, per month (billed annually)
- Power: $64 per seat, per month (billed annually)
- Enterprise: $99 per seat, per month (billed annually)

2. meetergo
Personal rating: ⭐⭐⭐⭐ 4.7/5 stars | Starting price: $0 | Integrates with Google Calendar, Outlook, Zoom, Slack, Stripe | Best for small teams | Ideal for booking qualified leads
Next in line is meetergo.

Using its Routing forms and funnels, you can create a funnel by giving it a name and selecting a type. Next, you can view and customize its pre-built form designed to collect data such as name, email, and phone number. You can also add more fields with text or multi-line input.

You can also create booking pages with meetergo by naming them, adding a short description, choosing the meeting duration, and selecting the location. Once ready, you can copy and share the link on various channels, such as LinkedIn, and even embed it on your Website.

Moreover, meetergo has a Booking feature that gives you an overview of all your meetings, including your upcoming, finished, cancelled, and unconfirmed meetings.

That’s not all! Its Workflows feature allows you to set up final meeting reminders by letting you choose when they should be sent and how long before the meeting. You can also decide how your attendees receive the reminder(e.g., via email).

With meetergo’s Premium routing forms and Funnels feature, you can create forms to collect data and share the link on your various channels to generate more leads. Additionally, you can embed the form link on your website. If you're comparing options, here’s a breakdown of the best lead capture tools that can help you do this even faster.
Let me show you how. First, click “Routing forms & Funnels” under “Tools”.

Then go to “Create”.

Name the form, choose the type, and click ‘New’ to create it.

You will see a pre-built form. If you still want to add more fields, click “Add Form Field”.

Below are examples of the fields you can add. In case you don’t find what you want, meetergo allows you to create new ones.

Once you are done, share, copy, or embed it on your website.

If you click on “Share”, the link will appear. You can copy it and put it on social media, for example.

I decided to share this link on my LinkedIn to generate some leads.

Once my leads click the link, they will see the form I created and insert their information.

The more channels you share your link to, the higher your chances of generating more leads.
Apart from this feature, meetergo offers other amazing features, and I will mention a few.
Key Features
1 . Meeting Types
Booking pages are an excellent way for your prospects to schedule appointments, and you can create them using meetergo’s Meeting Types.
To create a booking page, click “New” and go to “Meeting Types”.

Then select the meeting mode. I’ll choose the single-host meeting.

You will then choose between a one-on-one or group meeting. For this tutorial, I’ll go for the one-on-one meeting.

The next step is to choose who will host the meeting. Once you have done so, click “Create Meeting Type”.

It’s time to add information about your booking page. Add a name and description, choose the meeting duration and venue, and click “Publish” once you are through.

Your booking page is ready! This is what it will look like to your invitees:

2 . Bookings
As many people begin to schedule appointments with you and your team, you need a system that keeps track of everything. After all, you can’t remember all your past or upcoming meetings.
But the Bookings feature helps in this regard. To use it, locate “Meetings” under the “Schedule” tab.

You will see an overview of all your bookings, including your upcoming, finished, cancelled, and unconfirmed meetings.

If you click on a booking, you will see more information about the meeting: the date, duration, channel, link, attendee’s name, and even their website and LinkedIn.

3 . Workflows
Imagine manually sending reminder emails to your invitees an hour before meetings every time. That would be a hassle! meetergo’s Workflows takes that burden off your shoulders by automating the entire process.
This is how you set it up. Under “Tools”, go to “Workflows”.

You can use pre-existing templates if you don’t want to create a workflow from scratch.
Let’s use the “Final Meeting Check” template.

On the left side of the interface, you can name your workflow. In the template, you can set up the trigger and the action quite simply.

That’s it! Now, anytime someone schedules a meeting with you or your team, meetergo will send them a final meeting notification 5 minutes before the meeting.
What I Liked vs What could improve
What I liked 👍
✅ You can create Premium routing forms and funnels that qualify leads before they book.
✅ Setting up automation, like a reminder, is so easy. I did it on my first try with their “IFS” and “ELSE” approach.
✅ The system syncs so well with calendar and CRM like Google and Hubspot, to create activities and store leads info.
✅ It has GDPR compliance, is hosted in the EU and supports multiple languages.
✅ The automation feature focuses on lead follow-ups. This lets you create a tailored workflow to follow up or remind leads easily.
✅ It lets you create a variety of meeting types like
✅ meetergo is cost-effective. It offers features like routing, scheduling and qualification at a price point significantly lower than competitors for similar feature sets.
What could improve 👎
❌ Comes with a useful Premium video booking page feature, but it’s not on the free plan.
❌Calgent AI which is a great executive AI assistant is still in beta
Best for
- Businesses and teams seeking to generate more leads through form links, create booking pages, and automate workflows.
Pricing
- Free: €0 forever, unlimited users, all 15 apps at starter limits
- Light: €9.90 per user/month, billed yearly, one app fully unlocked
- Suite: €29.90 first year, then €34.90 per user/month, billed yearly
- Premium: €49.90 first year, then €59.90 per user/month, billed yearly

3. HubSpot Marketing Hub
Personal rating: ⭐⭐⭐⭐ 4.5/5 stars | Starting price: $15/month | Integrates with Salesforce, Zapier, Google Analytics, Mailchimp | Best for large teams | Ideal for inbound lead capture

Hubspot Marketing Hub’s Forms helps you create various form types, such as the editor, embedded form, standalone page, or pop-up box. You can add your preferred properties in your form, such as your first and last name, email, and phone number.

The Email feature comes with templates like newsletters or promotions. You can customize them by adding your logo and message. You can also choose the recipients of your email and can even select the contacts who must not receive it.

Furthermore, you can create a campaign by adding a name, choosing a color, choosing an owner, and setting a campaign start and end date. You are free to add the campaign goal, audience, and note.

Of course, you can create Ads too by connecting your Ad account, such as Facebook, Google Ads, or LinkedIn, to your Hubspot. You will then see the number of impressions, clicks, contacts, and customers, and the amount of money spent.

Let’s focus on why you are reading this article. Hubspot offers many ways to generate leads, one of which is through Forms. I will create a form now that asks leads to enter their names, phone numbers, and emails before they can access my free materials.
First, I’ll locate the “Marketing hub” icon and click “Forms”.

Then I’ll go ahead and start creating my form.

Hubspot will allow you to choose how you want to build your form. I chose the embedded form.

There are various templates available, but let’s go with the ebook download one.

Choose the properties you want to include in your form. I want it simple, so email, name, and phone number will do.

Now, choose what should happen when a lead fills out the form and submits it. You can redirect them to an external URL or leave them a “Thank you” message.

Next, set up your follow-up email after they submit the form. You can preview the workflow for an overview of how it will work. In this example, the form submission is the trigger.

Once submitted, an email will be sent to the lead as the following action.

Your form is ready! You can embed it on your website or copy and share its link on your various channels.

Once visitors use your link, it will first take them to the form.

After they have filled it, they will receive a thank-you message.

This is a great way to generate leads. But let’s also look at other features Hubspot offers.
Key Features
1 . Email
Emailing contacts or leads remains one of the best ways to keep engaging with them.
Hubspot marketing hub allows you to do that.
In the Marketing hub, select “Email”.

This brings up some templates you can use to create your email. I’ll use the newsletter template.

The editing elements on the left side allow you to edit the template. For example, you can add your logo and craft your message.

Under the “Send or Schedule” tab, enter the recipients of your email and select the contacts who must not receive it. Afterwards, choose the sending time.

Next, click “Review and Send”.

Here’s an image of how the email will appear in your leads’ inbox.

2 . Lead scoring
This feature lets you assign numerical points to a lead based on certain criteria. With this method, your team will know which leads to focus on.
Within the Marketing Hub, click “Lead scoring.”

You can choose to score contacts or companies. Let’s go with the contacts.

You can set your scoring rules under the criteria. For instance, if the job title is equal to CEO, director, or project Manager, the score could be 10 points.

Next, choose who you want to score(e.g., all customers).

And there you have it! Your lead scoring will appear in the third column of the Contacts page.

What I Liked vs What could improve
What I liked 👍
✅ It's a centralised platform. So you can manage content, set automation and social media in the same space.
✅ You can score leads by assigning a number of points for a criterion to get the best lead.
✅ Has a dashboard that shows a breakdown of what drives leads, deals and sales.
✅ It comes with native Hubspot CRM, which works well with it.
What could improve 👎
❌ The pricing becomes more expensive when your leads increase. Example, you have to pay $150 a month for enterprise tier for more leads.
❌ Important lead generation features like Campaign and lead scoring are locked behind paid tiers.
Best for
- Marketers and large businesses looking for an all-in-one platform for creating ads, forms, and emails.
Pricing
- Sales hub starter: $15/ month/ seat
- Starter customer platform: $15/ month/ seat
- Sales hub professional:$90/ month/ seat
- Sales hub enterprise: $150/ month/ seat

4. Apollo.io
Personal rating: ⭐⭐⭐⭐ 4.2/5 stars | Starting price: $0 | Integrates with HubSpot CRM, Salesforce, Gmail, LinkedIn | Best for mid-sized teams | Ideal for prospecting outbound leads

The Home dashboard in Apollo.io shows daily prospect recommendations and email stats for a period you can adjust. This includes the number of emails sent, delivered, opened, replied to, and bounced.

Using the People feature, you can search for leads using filters, such as the job title, company size, location, industry, and keywords. With its AI enabled, you can access their verified emails and phone numbers with advanced filters.

Moreover, the Meetings feature allows you to create various booking page types, including single-host, multi-host, and round-robin. There are fields where you can add basic details such as the meeting name, duration, and description, and later choose the host and location.

What’s more, you can build a sequence by choosing a sequence step, which can be a manual or automatic email, phone call, or action item. Interestingly, the in-built AI can assist you with the sequence when you add the company or product name, mention pain points and the value proposition, and add a CTA(Call To Action).

I will review Apollo’s sequence feature and show you how you can generate leads from there.
Without further ado, locate “Sequences” in the feature menu.

You can use Apollo AI to create your sequence, and that is what we will do.

For the AI to generate a complete sequence, you need to provide information such as the company, product name, customer pain points, value proposition, call to action, and the company overview.

With your sequence now created, you can view the automatic emails and when they should go out. After checking it, save your sequence.

Now that your sequence is ready, it’s time to add contacts.

If you already have a contact list, you can upload it to Apollo as a CSV (Comma-Separated Values) file. But I’ll use the prospect searcher to illustrate.

Once again, use filters to your advantage when searching your leads. They help you narrow your search significantly. Speaking of filters, I set a project manager filter for the job title and used the United States as the search location. For this tutorial, I will select the first result.

After clicking on a lead, you can view more information about them, such as their contact information, work history, and company insights. I decided to click on “Access email.”

Next, select “Add to Apollo sequence”.

Here, choose the sequence you created and select the sender email(s). You can also schedule or cancel the action. Finally, add the contact to complete the process.

On your sequence page, you can see whether it is active or not. You can also view the email statistics per individual, including the ones scheduled, delivered, replied, interested, and opted out.

The sequence feature on Apollo can help you generate many leads. I am sure there are other features worth mentioning.
Key Features
1 . People
Thanks to this feature, you can search for and find people using a set of filters, such as job titles, location, company size, industry, and more.
On the sidebar, select “People”.

I selected a few filters just to try out the feature. Among these filters are the job title (General Manager), email, company, location (United States), and Industry.

After I got some results, I clicked on a contact’s email address and noticed that I could take some actions, such as sending an email or adding to a sequence.

2 . Meetings
Booking pages are a great way to let your leads book a meeting with you or your team. You can also do this through the meetings feature on Apollo.
Creating a booking page is simple. Go to “Meetings”.

Let’s go with the “Single host” meeting type.

Add the basic meeting details such as the meeting name, duration, and description.

Then choose the host and the location.

That’s all! After you’ve shared your meeting link, your attendees will see your booking page and be able to book a meeting.

What I Liked vs What could improve
What I liked 👍
✅ It comes with a very large database (over 210 million contacts and 35 million companies) and strong filters for your ideal lead.
✅ You can directly set email outreach to the generated leads list right on the spot.
✅ It best provides me with verified leads, contacts and companies.
✅ You just have to apply the filters to get your ideal leads, which makes the learning curve very modest.
✅ Although it focuses on generating leads, it offers additional features like the meeting feature to create your booking page.
What could improve 👎
❌ Advanced filters require more skills, and you may struggle if you are not tech-savvy.
❌ The reporting system could have a more detailed the lead source attribution.
❌ You cannot look into a lead’s full details without spending credits. It would be better if we spend credit on generating leads only.
Best for
- Businesses and sales teams seeking a platform that can research people with AI, create sequences, and build booking pages.
Pricing
- Free: $0
- Basic: $49/ per user, per month, billed annually
- Professional: $79/ per user, per month, billed annually
- Organization: $119/ per user, per month, billed annually

5. Unbounce
Personal rating: ⭐⭐⭐⭐ 4.1/5 stars | Starting price: $74/month | Integrates with WordPress, Zapier, HubSpot, Google Ads | Best for marketing teams | Ideal for campaign-landing pages

Unbounce allows you to build landing pages through its Pages feature by picking a content type, choosing a template, inserting your information, such as a logo, and your preferred content. You will also set up your click action (e.g., sending an email when someone clicks).

This lead generation software lets you create pop-ups and sticky bars by choosing your perfect template and customizing it by changing the writing, fonts, colours, and action.

Interestingly, it comes with an AI-powered Smart copy feature that helps you generate Ad copies, emails, products, and descriptions. You can set the prompt by choosing the language, who you are writing for, the benefit, feature, and topic.
On top of that, Unbounce can integrate with popular CRMs like Hubspot and Salesforce, communication tools like Slack, and marketing automation tools like Mailchimp.

Building a landing page helps you get more clicks, eventually generating more leads.
I am about to show you how to build one.
To begin, go to “Pages” and click “Start building now”.

You will see various pre-built pages. Let’s say I want to hold a webinar. Based on that, I’ll choose the template that appeals to me the most.

The template is already looking good. There is an area for collecting the lead’s information.
You can adjust the details on the template as you please.

I’ll set up a click action on the landing page that says “Save your spot”. Then I’ll add my email. Once a lead clicks, they will receive a follow-up email.

You can change or delete images from your selected template.

When you are satisfied with your settings, click “Publish”.

Your page should be live now; you can copy the link and share it with others.

Once a lead clicks your link, it will take them to your landing page, where they can leave their information and save their spot.

You can even see the performance of your landing page in real time under the page statistics.
I tested it and generated three(3) leads within the first seven minutes.

Key Features
1 . Popups & Sticky bars
If your website struggles to attract potential customers, it’s probably because it lacks one of those features: pop-ups or sticky bars.
Let’s quickly see how to create it.

We will choose a sticky bar for this tutorial.

Next, choose your preferred template. I was looking for an ebook download template, and I found it there.

Now I only have to tweak a few things, such as the main line on my sticky bar.

I also attached a URL to the call-to-action button.

Lastly, I set up the domain and clicked “Publish”.

Take a look at how your sticky bar will appear:

2 . Integrations
Nowadays, most tools allow for integrations with other software, and Unbounce is definitely one of them. You can integrate Unbounce with most of the popular apps you use.
To explore this feature, click “Integrations” on your account homepage.

You will see that Unbounce integrates with famous apps like Hubspot, Mailchimp, Slack, and Salesforce.

You are free to connect whatever apps you use to improve your workflow.
What I Liked vs What could improve
What I liked 👍
✅ The drag-and-drop editor allowed me to create a page and form faster and easily. I just had to move elements.
✅ There are a variety of customizable pages for you to easily design pages for demo, sign-ups and more.
✅ You can clone pages to test A/B to save time.
✅ The pop-ups and sticky bar respond well, especially when a lead is about to leave your site page.
✅ It integrates and syncs well with CRM, especially HubSpot and MailChimp.
What could improve 👎
❌ Flexible pricing tiers for teams that run multiple campaigns at a time would be nice to have.
❌ I struggled a bit to integrate HubSpot into the system. It required more steps, especially when mapping the custom fields.
Best for
- Businesses looking for a platform that can create landing pages and integrate with Hubspot, Slack, and Mailchimp.
Pricing
- Build: $74/month, billed annually
- Experiment: $112/month, billed annually
- Optimize: $187/month, billed annually
- Agency: Custom pricing

6. Albacross
Personal rating: ⭐⭐⭐⭐ 3.8/5 stars | Starting price: €79/month | Integrates with Pipedrive, HubSpot, Salesforce, Mailchimp | Best for B2B teams | Ideal for website visitor lead alerts

Albacross is the next software on this list. It allows you to start a campaign by naming it, writing the subject and the email body, choosing the owner, and adding your prospects’ email addresses via an Excel list or CSV format.

The statistics show key metrics of your campaign, including the reply rate, task completion rate, bounced rate, accepted connection request(CR) rate, the number of contacted prospects, replies, and accepted connection requests.
More so, the Website Page feature allows you to create a page by naming it and selecting a path. You can categorize your visitor intent level into four levels: high intent, medium intent, low intent, and neutral.

There is Buyer Personas feature where you can use the built in AI to create profiles of your ideal customers. You just type in a company’s URL into the AI prompt, check the suggested profile, add target keywords like marketing and data science before you give it a name and save it.

What’s more, you can create a buyer persona in Albacross with a name, the seniority level for your contacts, job functions and roles, potential buyers' countries, and the language for localizing them.
After testing this tool, I realized I needed to start a campaign to generate leads. I will show you how to do that on Albacross.
The very first thing to do is to click “Auto-engage”.

This will redirect you to a home dashboard allowing you to create a new campaign.

I decided to use Albacross AI to create the campaign. I only gave it my description and the channel I wanted to use for the campaign. Then I clicked “Create Campaign”.

In the sequence, you will see the first email with the subject and the body.

Below is a scheduled date for the second email, just in case the recipient doesn’t reply.

Then, it ends with a third email in case there is no answer.

When all is set, click “Start Campaign”.

But when you start your campaign, there are no prospects. You will need to add prospects for the campaign to work.

You can drag your Excel list or a CSV file full of prospects. Luckily, I already have a CSV file of my prospects, which I will use for this campaign.

There you go! Now you can continue.

Albacross found three prospects that I can add to my campaign. This means the rest didn’t match the requirements.

As Albacross has automatically added the prospects, they will receive this campaign and decide whether to open the email and respond.

The more prospects you add to the campaign, the higher your chances of turning them into leads.
Key Features
1 . Website pages
I found this feature interesting because it helps you categorize your website pages based on visitor intent level. For example, if visitors visit the pricing page, I can mark their intent level as high. You may mark it as medium
To use this handy feature, click the “Website Pages” tab.

You will have to add a page so click the “Add page” button.

Next, enter the page name and select the path. In the screenshot below, I will categorize the visitor intent based on the path I selected. For me to categorize them, the visitor must visit the “Pricing” page, to be exact.

There you go! Your page has been created. On the right side of the interface, I can categorize the visitor intent level as high intent, medium intent, low intent, or neutral.

I marked it as high to follow up on such visitors easily.

2 . Buyer persona
If you know who your buyer is, you will know how to reach out to them. The Buyer persona feature helps you understand your ICP(Ideal Customer Profile). With that information, you can filter leads and create offers targeted to the right audience.
Let me show you how I created mine. First, go to “Buyer Personas”.

Then, provide a persona name, select the seniority level for your contacts, job functions, and roles, the countries of your potential buyers, and the language.
I added some details based on my buyer persona.

The AI assistant helped me refine my buyer persona. Afterwards, I saved it.

My Buyer Persona is now ready! Thanks to this insight, I will now know the kind of leads to target.

What I Liked vs What could improve
What I liked 👍
✅ The filter system is advanced and easy to use. I can exclude certain criteria to focus on fresh leads.
✅ It has a clean UI, which makes it easy for me to set up and use.
✅ I can use it to identify the companies that visit my website, even if they do not fill out a form.
✅ It returns intent data, like companies with which we share common objectives. I use this to create outreach.
What could improve 👎
❌ Sometimes, it returns shared inboxes like “@info” or “@sales”, instead of the verified personal contacts I was looking for. Precision can be improved.
❌ The dashboard report interface is neat, but feels limited. I would like to have more control over columns and visuals.
Best for
- Marketing teams looking for a platform that can help start campaigns and track visitor intent level on their website.
Pricing
- Starter: €79/per user, per month, billed yearly
- Professional: €127/per user, per month, billed yearly
- Organization: €159/per user, per month, billed yearly(min 3 users)

7. Hunter.io
Personal rating: ⭐⭐⭐⭐ 4.0/5 stars | Starting price: $0 | Integrates with Gmail, HubSpot, Zapier, Salesforce | Best for sales teams | Ideal for finding email leads
Hunter.io has a Discover feature that comes with an AI assistant.

The assistant lets you describe the companies you are looking for in the search bar and helps you find them using available filters and keywords. However, you can also discover your leads manually by using available filters such as industry, location, company size, and more.

In terms of credibility, the Verifier feature helps you verify emails after entering an address or a list of addresses in the search bar. Once verified, you will see the email's status, including the format, type, server status, and email status.

But there is more. You can launch a campaign on Hunter.io by naming it, selecting the email address from which it will be launched, writing the subject and the email body, adding the recipients manually or from a CSV list, and scheduling the launch date.

Additionally, you can create leads with details such as email addresses, first and last names, positions, phone numbers, LinkedIn profiles, industries, and countries. You can also add custom attributes.

Launching a Campaign is one of the best ways to generate leads and engage them. So, without wasting much time, we are going to do that.
First, I will select “Campaign” on the sidebar.

Then click “New campaign”.

I will then name my campaign and select the email address from which the campaign will be launched.

Next, write the subject, and then the email body. The idea is to launch the campaign for those struggling to scale their campaigns. We want to introduce our AI as a solution.

Below, you can add or remove an unsubscribe link in the email and allow the platform to track email opens and link clicks.

Once done, click “Send”.

It’s time to add recipients to the campaign.

I will manually add recipients because I don’t have any leads. I have some potential leads' email addresses, and I want to use them for this campaign.

After adding them, click “Add recipients”.

Once done, go to “Next”.

Here, you can choose the day and time the campaign will be launched. If not, it will launch immediately.
You can also keep or rewrite the ‘Unsuscribe sentence” for this campaign. If everything checks out, click “Next”.

Your campaign is ready! Go ahead and click “Launch”.

The platform will ask you to set the campaign active.

Now, your campaign is officially active, as you can see below.

After some time, I decided to check the inbox. Interestingly, I received two responses. I clicked on one of the responses and saw that it was positive.
There is even the possibility of engaging the lead right from within the platform.

This is a perfect example of how to generate leads. Let’s also examine a few other features.
Key Features
1 . Discover
This feature comes with an AI assistant that allows you to describe the companies you are looking for and get instant results.
To use it, select “Discover” on the feature menu.

In the box, describe the type of companies you’re looking for. This is what I inserted in the box: ” B2B SaaS companies with 11–200 employees in North America or Europe, focused on marketing, sales, or CRM solutions.”

The results were instant! A number of companies matched my description. The list had each company name, the number of email addresses, and the options to follow them and find their email addresses.

I decided to click on the first company and saw its email address, owner, and position in the company. You can save each email address as a lead or add it to a campaign.

2 . Lead
When using this feature on Hunter.io, you will have an overview of all your leads with their personal details. From there, you can engage with each of them as you please.
The first step is to locate “Leads” on the sidebar and select “All people”.

Hunter.io will display your leads’ names, email addresses, companies, positions, verifications, sending statuses, verification dates, and creation dates.

After I clicked on a lead, I could edit and even send a direct email from the platform. Below, I also saw all the lead’s recent activities.

What I Liked vs What could improve
What I liked 👍
✅ I can find verified business emails from any company domain in just a few seconds.
✅ The Chrome extension allows you to capture decision makers' emails from LinkedIn directly.
✅ I can check for invalid emails and risky ones and remove them using the email verifier tool.
✅ The dashboard is intuitive, and I can train my team easily to use it.
What could improve 👎
❌ Could improve the data coverage of smaller, startup and international companies.
❌It sometimes returns company or shared email, not the individual emails I expected. This can affect my conversion rate.
Best for
- B2B businesses and companies seeking a platform that can find, verify email addresses, and launch campaigns.
Pricing
- Free: $0
- Starter: $34 / month, billed annually
- Growth: $104 / month, billed annually
- Scale: $209 / month, billed annually

8. Delighted
Personal rating: ⭐⭐⭐⭐ 4.0/5 stars | Starting price: $17/month | Integrates with Slack, HubSpot, Google Sheets, Zapier | Best for mid-size teams | Ideal for surveying lead sentiment

Delighted’s Survey feature is your go-to for creating surveys. You can set up a quick survey by adding your questions and choosing a response format, such as multiple-choice, numerical scale, text, or graphic scale. You can also add descriptive text and customize the form using colours, fonts, and size.

There is more! The Survey Dashboard gives you an overview of your surveys' responses. You can see the score and the comment left on the survey, and you can delete or edit each response.

The platform also lets you create Net Promoter Score(NPS) by providing the brand or product name, adding a logo, customizing the top bar color, and the button text color. You will also set your metric question and the comment prompt.

Last but not least, you can view the number of emails sent, how many were opened, responded to, and commented on with the Email metrics tool. You’ll also have access to the number of emails throttled, bounced, and unsubscribed, plus the number of unsubscribes.

We are going to create a survey that we will share on our various channels. We will notify all those taking the survey that we can rightfully contact them after the survey.
On the Home dashboard, click “Create survey”.

Now, add the question you want to ask. In this scenario, we are selling an AI marketing tool and want to know what people think about using AI in Marketing.

Choose a response format. I will choose the “Text” format to allow leads to write their responses.

Under Text, you can choose Multiple lines or Single line.

As part of the question settings, I added descriptive text that indicates that we reserve the right to contact those taking this survey.

You will first write the reason for the survey, review your question in the middle, and craft your “thank you” message. Once done, you can publish the survey.

Your survey link is ready! You can copy it and share it on all your channels.

If someone uses the link, this is how they will take the survey.

They will have to answer the question in a single line as set earlier. It is also clearly stated that we can contact participants.

Back on the platform, under contacts, you can see the email, the number of responses, and when it was last responded to.

This way, those taking the survey automatically become leads because we can contact them anytime. Delighted has other features that we can also review.
Key Features
1 . NPS
You can use the Net Promoter Score to create a survey and send it to your existing customers. In this survey, you can ask them for their feedback on a product or service.
To locate the NPS, you first need to move from Delighted surveys to Delighted CX.

You will see the NPS survey, which is the most popular.

First, I will add the new product name and logo.

Under the ‘Metric question”, you can introduce your product and ask your customers if they are willing to buy it.

You can set up the comment prompt by asking your customers for more information about their choice.

This is what it looks like on the customer’s end:

2 . Dashboard
The dashboard gives you an overview of all the responses from your surveys, including the comments that were left.

When you click on a comment, you will see the customer's score. You can also delete or edit the comment. Below, you can view all the properties, including the browser, device type, and even the source customer used to access the survey.

What I Liked vs What could improve
What I liked 👍
✅ I can directly share the survey via email or embed it on a landing page easily to get feedback.
✅ The dashboard gives more details and updates me in real time to act fast.
✅ I can group feedback by campaign to find weak spots in my lead flow using the tagging system.
✅ It integrates well with Slack and HubSpot to help notify your sales team if a lead responds.
✅ The interface is so clean that I was able to create a survey for the first time.
What could improve 👎
❌ I’d have like to see more customisation options to suit your brand aside from the colour and logo.
❌ Built-in automation feature to send follow-ups based lead’s response would be great to have.
Best for
- Small and large businesses looking for a platform that can gather and track customer feedback using NPS.
Pricing
- Starter: $17/month
- Growth: $35/month
- Advanced:$134/month
- Premium: $224/month

9. Canva
Personal rating: ⭐⭐⭐⭐ 4.3/5 stars | Starting price: $0 | Integrates with Google Sheets, Salesforce, HubSpot, PayPal | Best for mid-size teams | Ideal for lead-capture forms
Canva is an online design tool you can use to generate leads creatively.

Thanks to the Apps features, Canva can integrate with many trending apps in the design world, such as Amazon creators, Dropbox, Mailchimp, LinkedIn, Meta design check, shotdeck, Shopify connect, and Krikey AI animate.

It comes with an AI feature that can generate anything from ideas, such as design, create an image, draft a doc, write anything, or code. You can add media and use the record button to record your instructions.

More importantly, Canva allows you to use pre-designed templates for presentations, sheets, docs, whiteboards, social media, videos, and websites. You can customize your design using fonts, colors, effects, animations, editing, deleting, and adding texts and images.

Furthermore, the Home dashboard shows various templates you can start your day with, and all your recent designs. You can open your recent design in a new tab, make a copy, move to a folder, download, share, copy the link, add tags, or move it to trash.

Canva is mainly known for design. But you can also generate leads with it. One way is to create a landing page and embed a link. I will show you how.
Go to “Website” once you are on the home dashboard.

You can type “Landing page” in the search bar and select a template that resonates with your idea.

Customize it using fonts, colors, headings, lines, bullet points, effects, etc.

To attract leads, you can offer a freebie. For instance, I will ask my leads to click on a link on my website’s landing page to access my free eBook. You can then click the link icon.

Finally, add your link.

Once you are satisfied with your creation, publish your page and share it.

When you click the Share button, you can check the access level and allow anyone with the link to view the page. The other sharing options are also below the link.

As simple as that, your website is now live.

When someone receives the link and clicks it, they are taken to the landing page, where the message and the Call To Action are.

I went back to Canva and checked the Analytics. The report indicated the number of unique visitors and total visits my landing page generated. Unfortunately, you need to upgrade your plan to at least Canva Pro to see more details.

Unfortunately, Canva doesn’t have a system for storing or tracking who clicked your landing page or who submitted anything.
Key Features
1 . Templates
Canva has already considered all your designs. This feature offers an endless list of templates for different occasions.
To explore what is available, go to “Templates”.

We will focus on social media and select Facebook ad templates.

I didn’t know what to choose because my options were limitless. But after some time, I was able to make up my mind.

I had the luxury of customizing the template, editing, adding, and removing anything I wanted. I even played with the colours.

Once done, I clicked the “Share” button and saw the sharing link available. There are many ways to get the design. You can download it, or copy the link and share it via email or other channels.

2 . Canva AI
Another interesting feature of Canva is its AI. With a single prompt, you can create virtually anything you imagine. Below the prompt area are some suggestions you can start with: Design for me, Create an image, Draft a doc, Code for me.
You even have the option to record yourself. Since we've already worked on a lot of design, I wanted the AI to write a blog post about the importance of generating leads in Business.

Canva AI exceeded my expectations. It created the blog post with graphics in less than a minute.

I clicked on the blog, and it was just amazing. Surprisingly, using the Canva Editor was still an option, and I went for it.

As we’ve seen with the other designs, you can also edit, use fonts, headings, colors, and most importantly, share it.

What I Liked vs What could improve
What I liked 👍
✅ The interface has an easy layout and a clear menu. You can create marketing graphics without training.
✅ I can design lead magnets like eBooks or ads in just a few minutes to save time. I just have to pick from the 10,000+ templates it offers and customise.
✅ It focuses on detailed customisation, so it provides high-end templates with more customisation options
✅ I can create a Brand Kit with my logo, brand colors, and fonts so every landing page banner, ad and other content match my brand.
What could improve 👎
❌ The free plan limits you to some number of templates, assets and customisation unless you buy the pro plan.
❌ It does not offer advanced tools like full animation or Photoshop layers, so creating complex visuals might be limited.
Best for
- Small businesses, teams, and individuals that are seeking a platform that can create a wide range of content and use AI, such as Magic Edit and Magic Studio.
Pricing
- Canva Free: $0/year for one person
- Canva Pro: $120/year for one person
- Canva Teams: $100/year per person

10. Jotform
Personal rating: ⭐⭐⭐⭐⭐ 4.5/5 stars | Starting price: $0 | Integrates with HubSpot, Mailchimp, Google Drive, Dropbox | Best for mid size teams | Ideal for designing lead-gen visuals

Lastly, we have Jotform. You can create online forms on Jotform by choosing a form layout, uploading your organization logo and name, and adding elements such as a heading, full name, email, phone number, address, and signature. You can also drag questions to your form.

Under “My Forms,” you can view all your created forms, the number of submissions, and when they were last edited. Each form has an “inbox” section that displays details such as the lead’s name, company name, the submission date, birth date, and additional comments.

Moreover, the Workflows feature lets you create workflows by choosing a form as a starting point, and adding elements such as payment, email, task, approve & sign, team approval, flow report, PDF, and signature document.

With Jotform’s Team workspaces, you can create a team by choosing a team avatar and a name. Once created, you can add or invite your team members by sharing a link via email or Slack.

I will use Jotform for what it is mainly known for: creating forms. In this example, I will make a course registration form and post it on all my social media accounts to generate leads.
First, I’ll click the “Create” button on the home dashboard.

Jotform lets you choose how to start. I’ll choose the form option.

You can start from scratch, but I used a template to save time.

On the left side, you will notice that various forms are available. Luckily, the form I wanted was also available, so I selected it.

You can add your logo, delete the fields you do not want, and even rewrite some sections in the form.

I also entered some courses that my company was making available to the public.

After adjusting everything, this is how I want my form to look.

Under the settings, you can enter a name for your form.

Under Emails, you will provide the email that will receive the notifications anytime someone submits a form.

You can also set up your “Thank you” page and redirect your leads to an external link after submission.

Your form link is ready! You can copy or share it directly on your social media accounts, such as Twitter, Facebook, or LinkedIn.

I went a step further by posting it on my Facebook page and waited.

When someone wants to register for the course my team and I have created, they will click the link and enter all the details on the form.

After completing the form, they will receive a “Thank you’ message.

I did not stop there! I tested other features, and I would like to discuss a few.
Key Features
1 . My Workflows
Building a workflow has become crucial for all businesses because it saves time. With this feature, we will create a workflow that allows your team to either accept or refuse a submission.
To test it out, go to “My Workflows”.

The workflow I will create now is called the “One-step approval”.

You will first choose the form on which you want to use this workflow, and then select the team member in charge of the approval process.

Under settings, you can name your workflow, enable it, and allow it to restart automatically every time responders edit their submissions. Once done, click “Publish” next to Settings.

A lead just signed up, which means the workflow is active. I can approve or deny his submission.

2 . My Forms
Creating forms, collecting data, and generating leads is good. But keeping track of every form is better. With this feature, you will see all the forms you’ve ever created with all the details.
Locate and click “My Forms” in the menu.

Below, you will see all your created forms, their number of submissions, and when they were last edited.

By clicking on a form, you can edit it or even view the inbox.

I clicked on a form “Inbox”, and I saw more details such as the lead’s name, their company name, the submission date, birth date, and much more.

What I Liked vs What could improve
What I liked 👍
✅ I love how I can show and hide some from my leads based on their response using the conditional logic feature.
✅ The drag-and-drop feature is intuitive. I was able to use it to create a landing page quite easily on my first try.
✅ It has hundreds of templates I can customise to capture leads or create surveys. I just have to edit colors, text and logo to match my brand.
✅ It integrates and syncs well with CRMs like Google Sheets and HubSpot.
✅ The interface is easy enough to let anyone in your team set up forms without experience.
What could improve 👎
❌ It can collect leads, but features like lead scoring or follow-up automation could be added to nurture them.
❌ Embedded forms can be customised, but with CSS. A customisation interface could have been added for non-developers.
Best for
- E-commerce and businesses looking to collect data through forms and streamline their workflows.
Pricing
- Starter: Free
- Bronze: $19.50/month (billed annually at $234)
- Silver: $24.50/month (billed annually at $294)
- Gold: $64.50/month (billed annually at $774)

How to Choose the Best Lead Generation Software
To choose the best lead qualification software, you must consider four(4) steps:
- Start with your goals
- Match the tool to your workflow
- Check integration with your existing CRM and tools
- Consider pricing and ROI
Let’s discuss each one of them in detail.
1 . Start with Your Goals
Before choosing your lead generation tool, you should first clarify your goals. Brian Tracy, one of the best sales consultants, said, “Success is goals. Everything else is commentary.”
He understood the importance of having clearly defined goals to succeed.
You might be struggling with low-quality leads, and therefore, your goal might be to generate better leads. This is totally fine, especially considering that about 37% of marketers said generating high-quality leads was one of their biggest challenges.

You need to choose a tool based on your goals. For example, you might want to book qualified meetings faster. In that case, your best option should be a tool that can capture leads and create booking pages in one go.
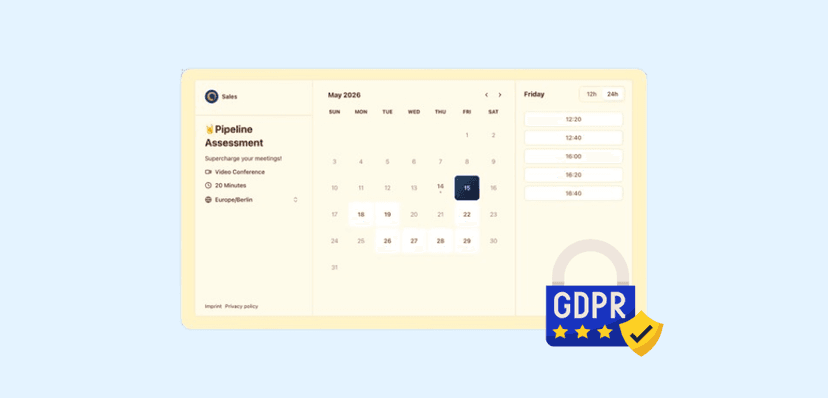
A tool like meetergo Premium can help you create funnels like the one below to capture leads.

You can also collect leads’ information at the same time.

Once captured, they can quickly book a meeting with your team members without going back and forth.

Understanding your goals should be the first step.
2. Match the Tool to Your Workflow
A great contemporary writer named Anthony T. Hincks said, “Make sure that you always have the right tools for the job. It's no use trying to eat a steak with a teaspoon and a straw.”
Though the illustration might appear humorous, it carries a profound message, especially when applied to our context.
With experience, I can boldly tell you this: the best tool doesn’t change your process. It rather amplifies what’s already working. Therefore, ask yourself these questions:
- How does my team currently handle lead generation?
- Is it mostly outbound or inbound?
When answered, the above questions can help you choose the right tool. You must match the tool to your workflow. For example, if your team is running cold outreach, I recommend using tools like Apollo.io.
Then, use tools like Typeform, OptinMonster, and meetergo to capture inbound leads from your site. Moreover, if you want to identify site visitors and enrich their data, consider using tools like Clearbit or Leadfeeder.
Again, you must understand your workflow to choose your tool.
3 . Check integration with your existing CRM and tools
One crucial aspect to check when choosing lead generation software is whether it integrates with your existing CRM, calendars, automation, and email marketing tools.
Integrating with CRMs like Hubspot, Salesforce, or Pipedrive has become very popular.

Integrating with Zapier is also a great step, especially for custom workflows.

Integrations will make your workflow easier, so they are key to consider before choosing your tool.
4. Consider pricing and ROI
In one of his videos, Bill Crawford, a seasoned marketing expert and former basement waterproofing franchise owner, discussed what success means to him.
He said that success was about spending the right amount of money to get the right amount of leads so that you hit your goals. I agree with him.
You will definitely spend some money on your lead generation tool, but consider the cost and also how many leads it can help you bring in monthly.
To be honest, I never recommend a very expensive tool, and I don't recommend a very cheap one. Balance is the key.

I am 100% sure that what you need is a smart investment that brings repeatable returns.
Choose the Best Lead Generation Tool
There you go!
We discussed the Best Lead generation Tools, including their features, pricing plans, and what they are best for.
We also discussed how meetergo helps generate leads on Premium by creating funnels and forms businesses can embed on their website or share on various channels.
Tools like Pipedrive, Apollo.io, Hubspot Marketing Hub, and Unbounce are also great for generating leads.
As shown throughout this article, I have tested each tool step by step to spare you the hassle.
Now, choose the Best Lead Generation Tool.